In this post we will see how to create Azure Virtual Desktop step by step from the user interface. Alternatively you can use PowerShell command to achieve the same.
The things you create in Azure are called resources, and every resource has to belong to a resource group. Since we will need to create several resources to get Azure Virtual Desktop working, we’ll start by creating a resource group for them.
Step 1: Creating Resource Group
Open the Azure portal( https://portal.azure.com) and login with you credentials. Open resource groups and click on create as shown below.
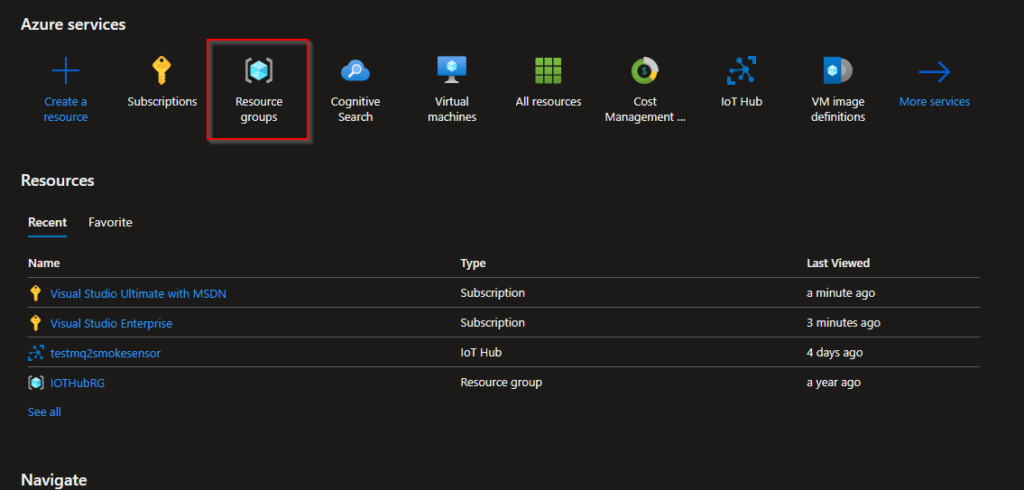
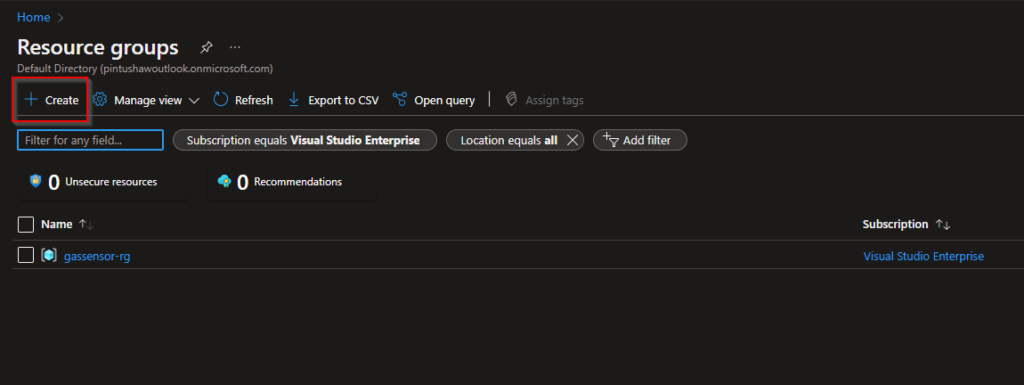
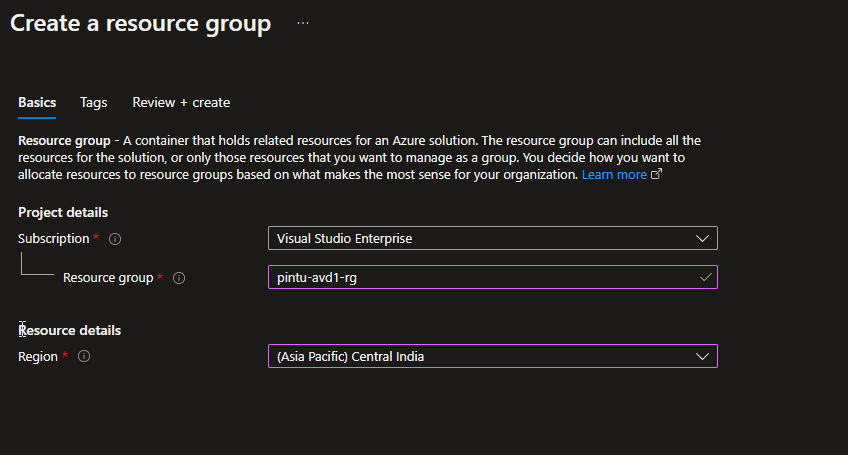
#create resource group
az group create –name “pintutrng-rg” –location “centralus”
If all goes well, you should see a success message as shown below and the new resource group should show up in the list.


Step 2 – Configuring Networking
We need to set up networking so that we have a way to reach our virtual desktop. Start by using search box to find Virtual networks as show below in the screenshot.
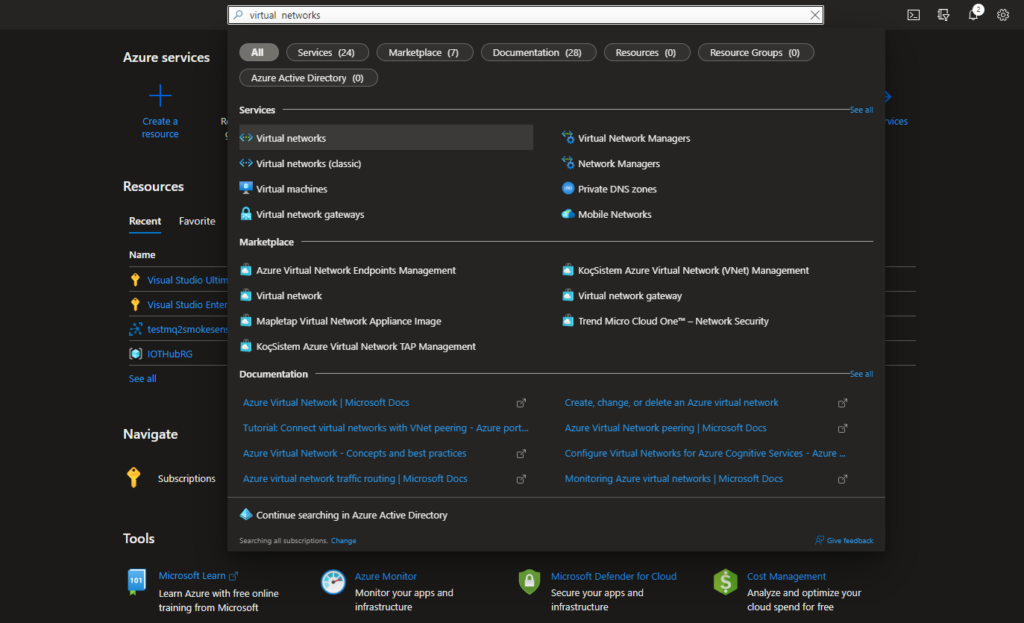
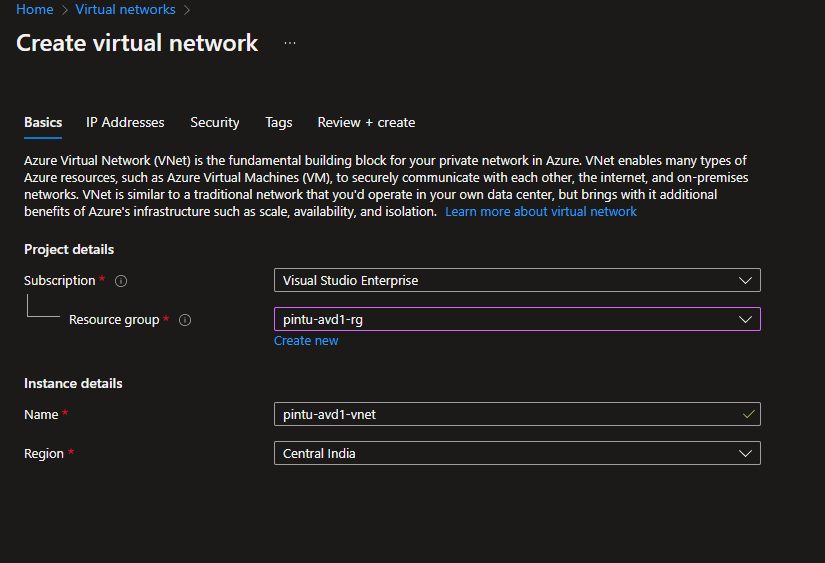
Give a name to the virtual network as shown below. eg: ‘pintu-avd1-vnet’. Note that we have selected the resource group selected in step1.
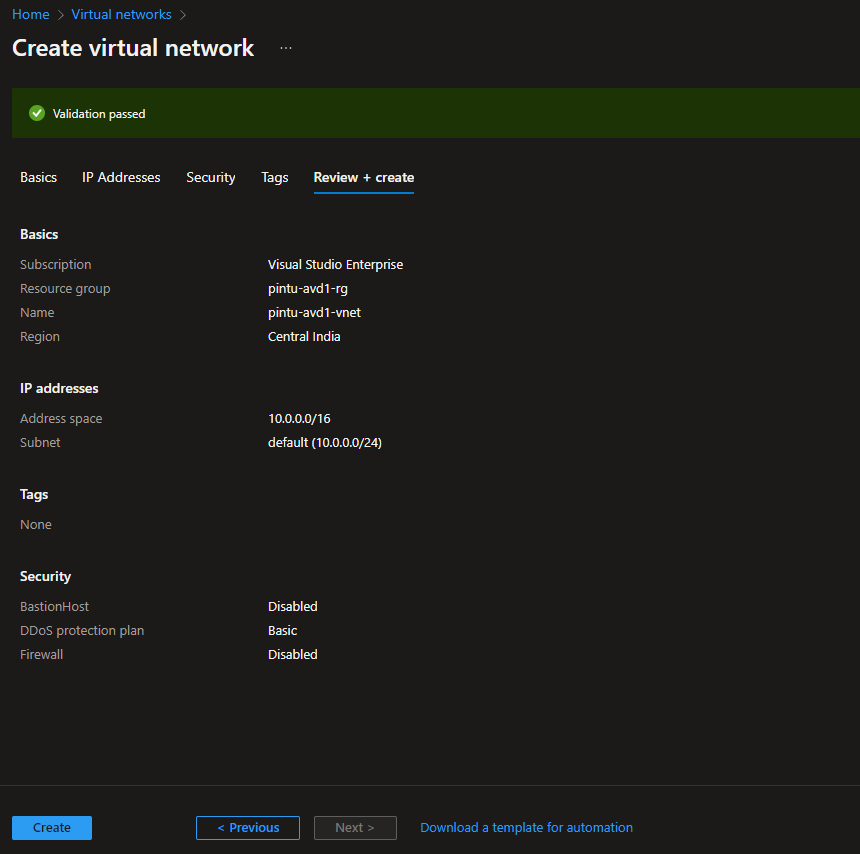
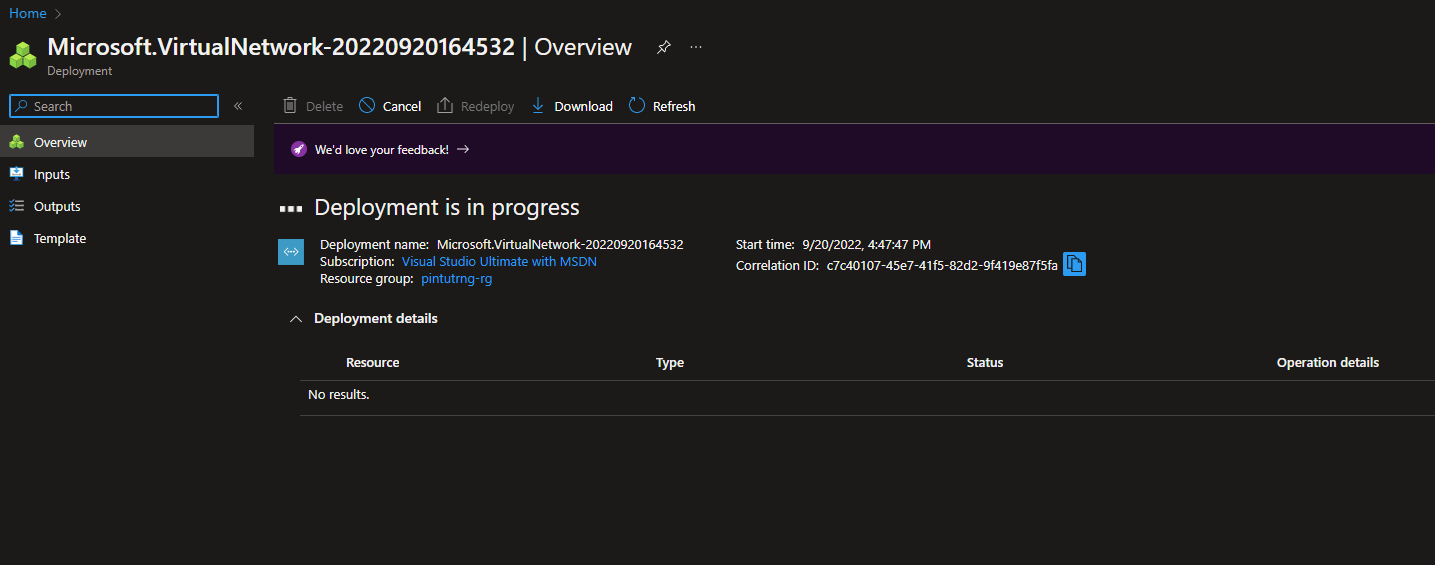
If all goes well you will see the virtual network listed.
Step 3: Creating the Desktop
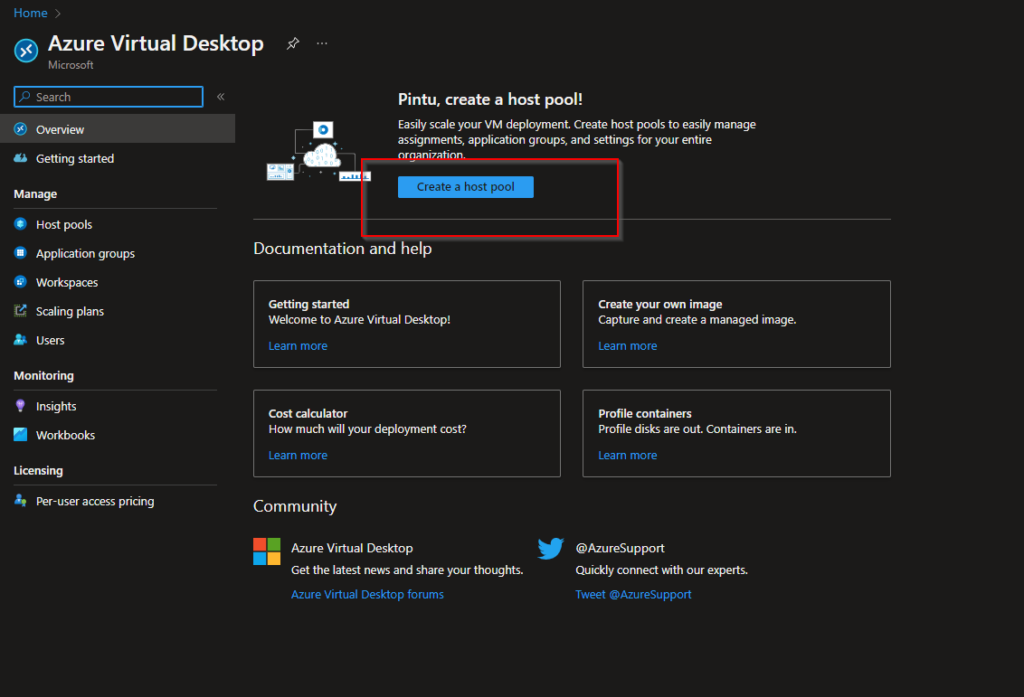
Now we’re ready to create the virtual machine that we will connect to. Use the search box to navigate to Azure Virtual Desktop as shown below.
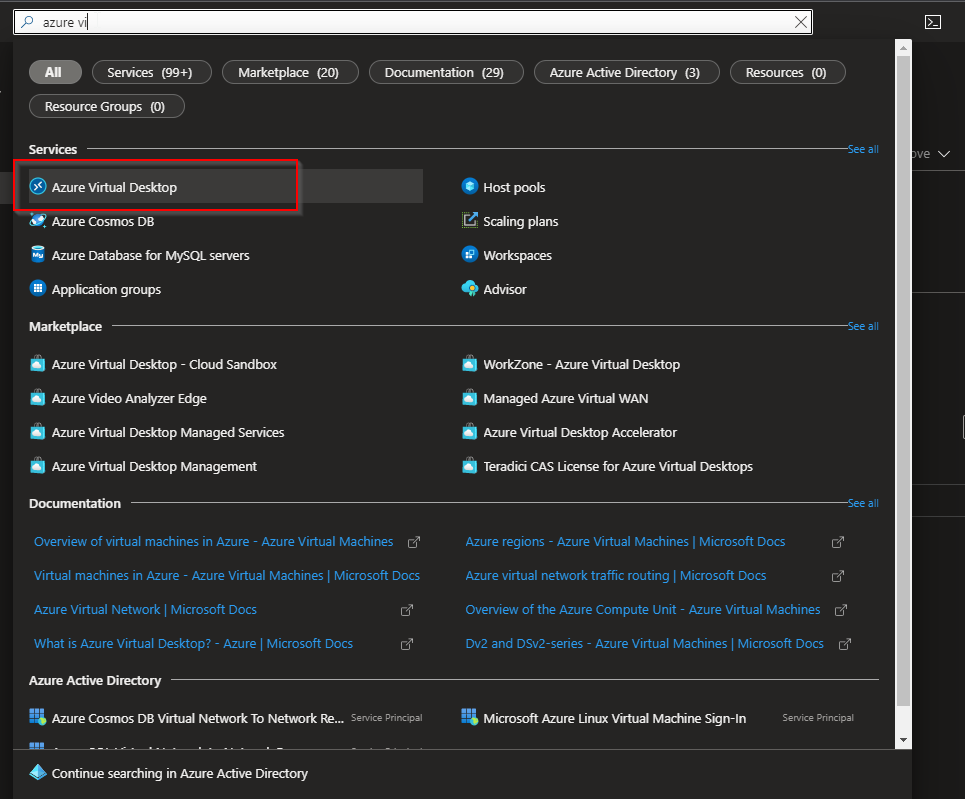
Choose Create a host pool. A host pool is a set of VMs that we want to use as virtual desktops. Even though we’ll only be creating one VM, it still needs to be inside a host pool.
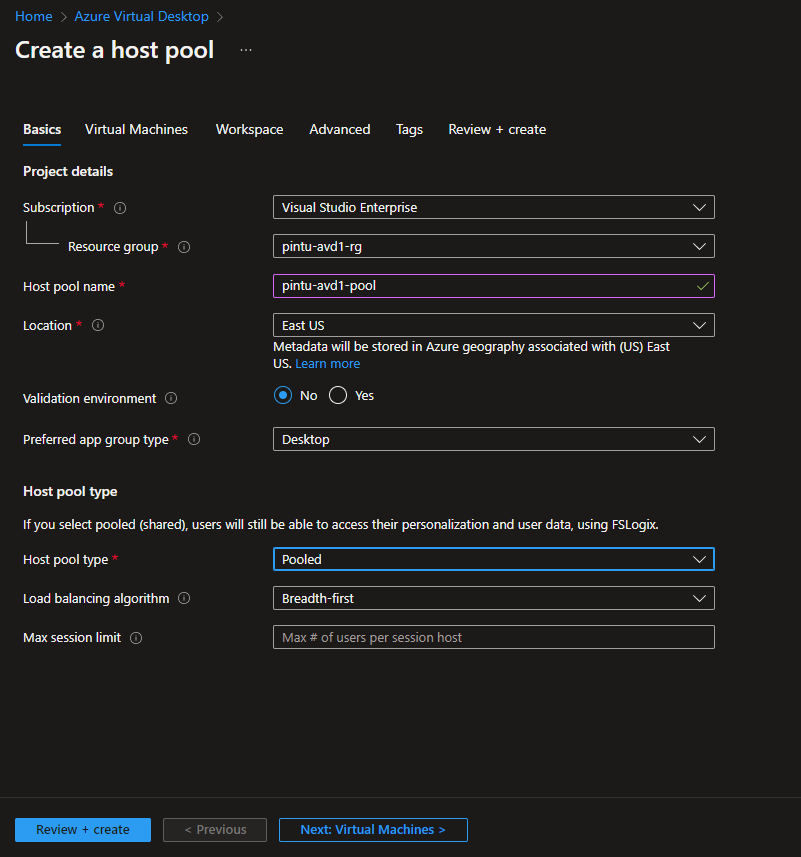
First we’ll enter the parameters for the host pool itself. You can use the same resource group as created in step1 and same location that you used before. Give your host pool a name, and set the type to Pooled.
Then move on to the Virtual machines tab. On the top part of the Virtual machines tab,
- for Add Azure virtual machines choose Yes.
- Then enter a name prefix for your virtual machine. When your virtual machine is created, this will be used to generate a name for it, such as “contoso-avd-0”.
- For location, choose the same region as you’ve been choosing in previous step.
- For a test deployment, you can set Availability options to No infrastructure redundancy required.
- For image, choose the Windows version you would like.
- Finally, set the number of VMs to 1.
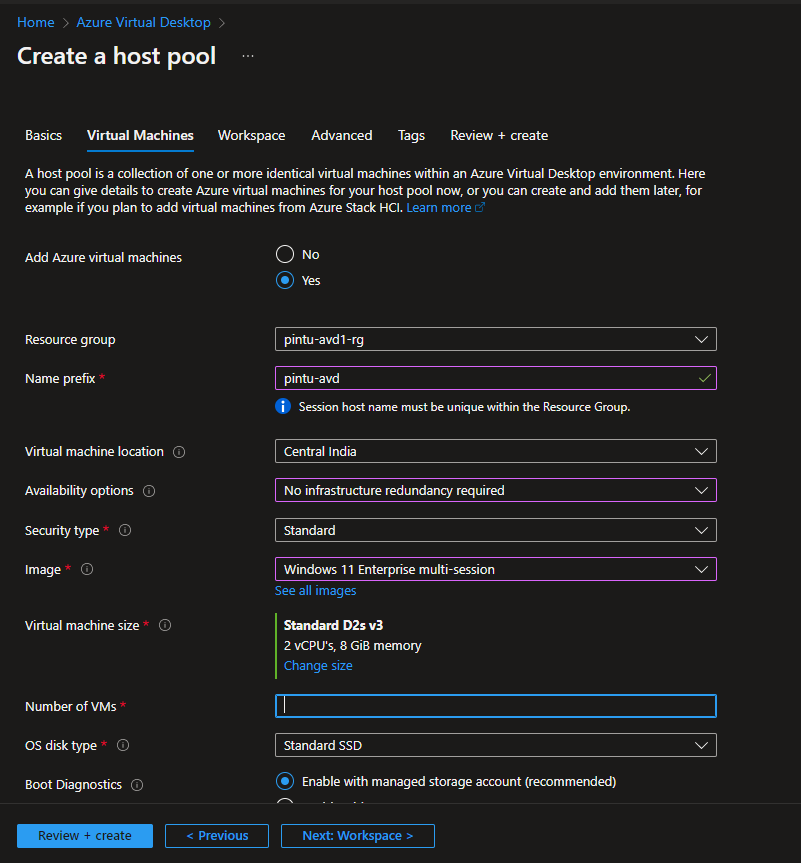
Now choose the size you’d like for your VM. Note that not all sizes are available in all locations. Also, choice of size will dramatically impact the cost – make sure you look at the cost per month!
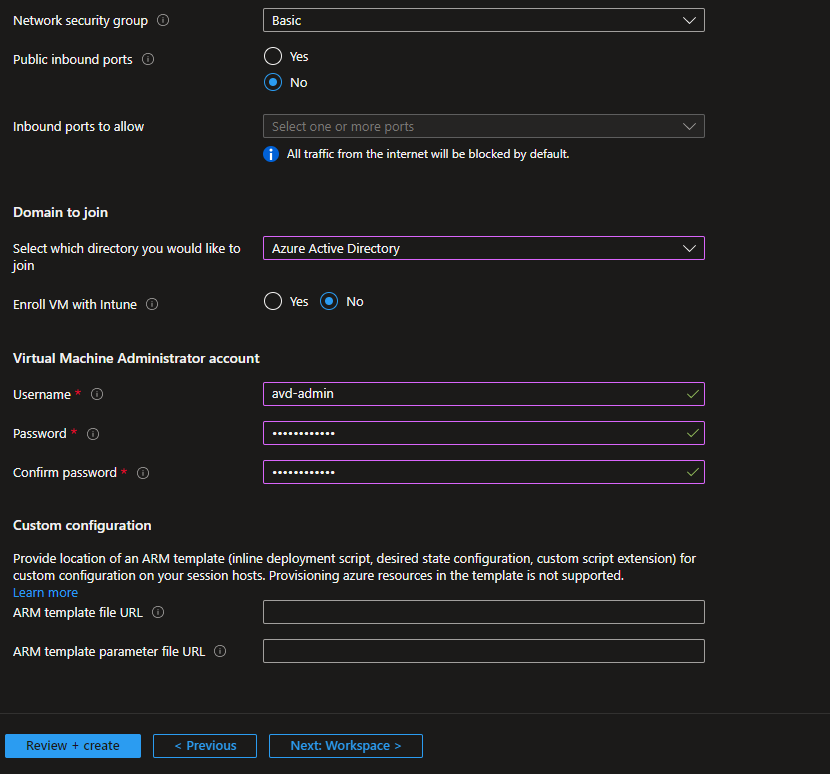
Scroll down the tab to the rest of the parameters. For Virtual network, choose the Vnet that you previously created. For domain to join, choose Azure Active Directory. Then enter a username and password for a local administrator account to be created on the VM. Then move on to the Workspace tab.
A workspace is what you “subscribe” to when you use the Remote Desktop app to connect to your VM. Select Yes for Register desktop app group, then click Create new to create a new workspace. Enter in a name for your workspace, then click OK.
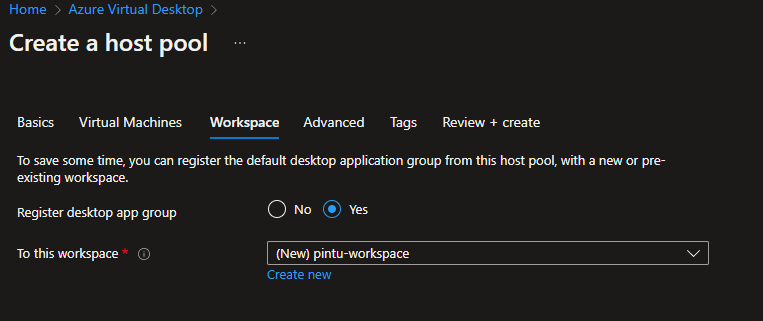
For a basic AVD setup you can skip the Advanced tab. You’re now ready to deploy your host pool. Click Review + create, and once validation is complete, click Create. The deployment make take a 10-15 minutes to complete. When it is complete, you should see a screen like the one shown below. At that point, click on Go to resource.

Step 4: RDP Properties
By default, a client device will only be able to connect to the virtual desktop if it is using the Windows desktop client and it is Azure AD-joined to the same Azure AD instance as is used with the AVD deployment. In this example we are planning to connect using the web client, so we need to remove these restrictions. To do that, navigate to RDP Properties:
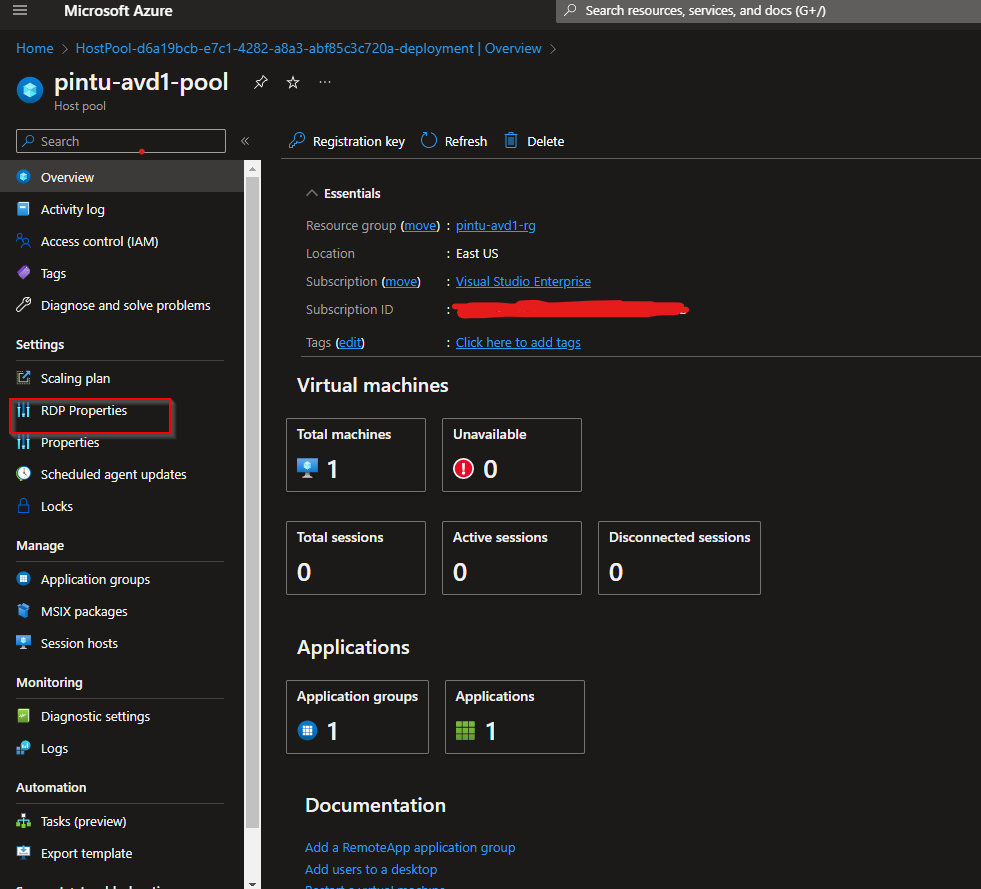
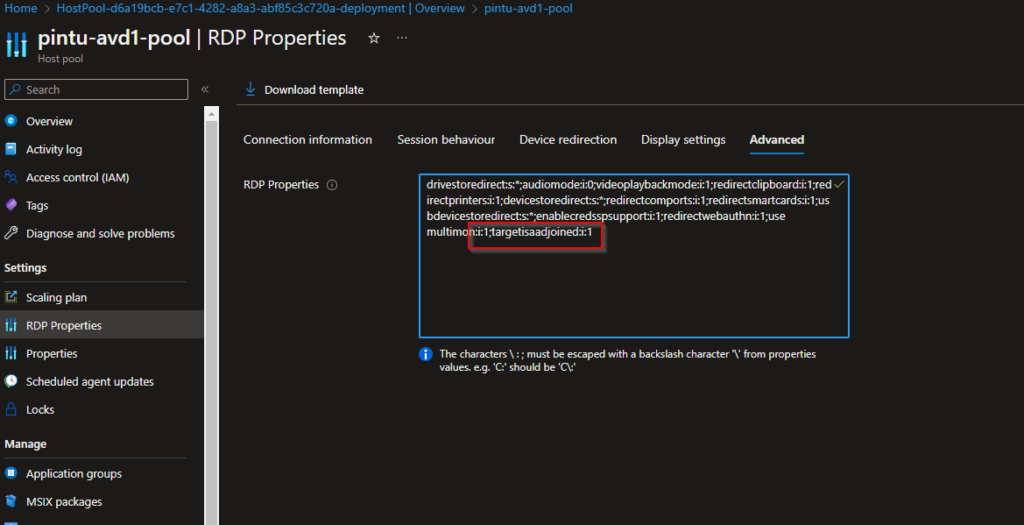
Select the Advanced tab and enter ;targetisaadjoined:i:1 at the end of the list of properties. Don’t leave off the semicolon at the beginning, you need to have a semicolon between each property in the list. Then click Save.
Step 5: Managing Access
These steps assume that there is already a user in Azure AD who you want to give access to. If you aren’t familiar with Azure AD, you can just use whatever e-mail you use to log in to the Azure web portal. Here we’ll assume you want to give access to a user xxx@outlook.com. Giving access is a two-part process.
Part 1
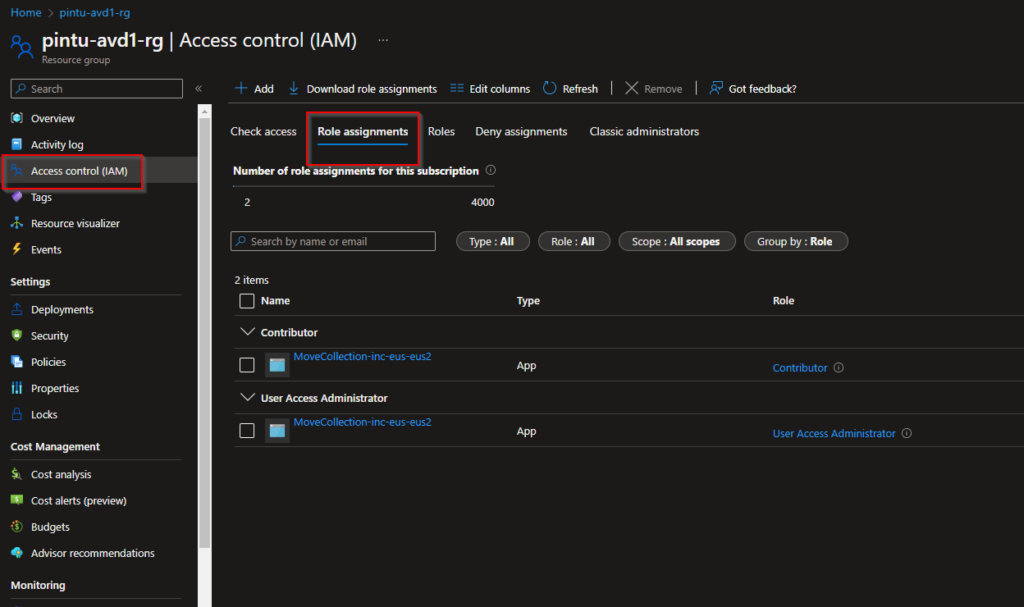
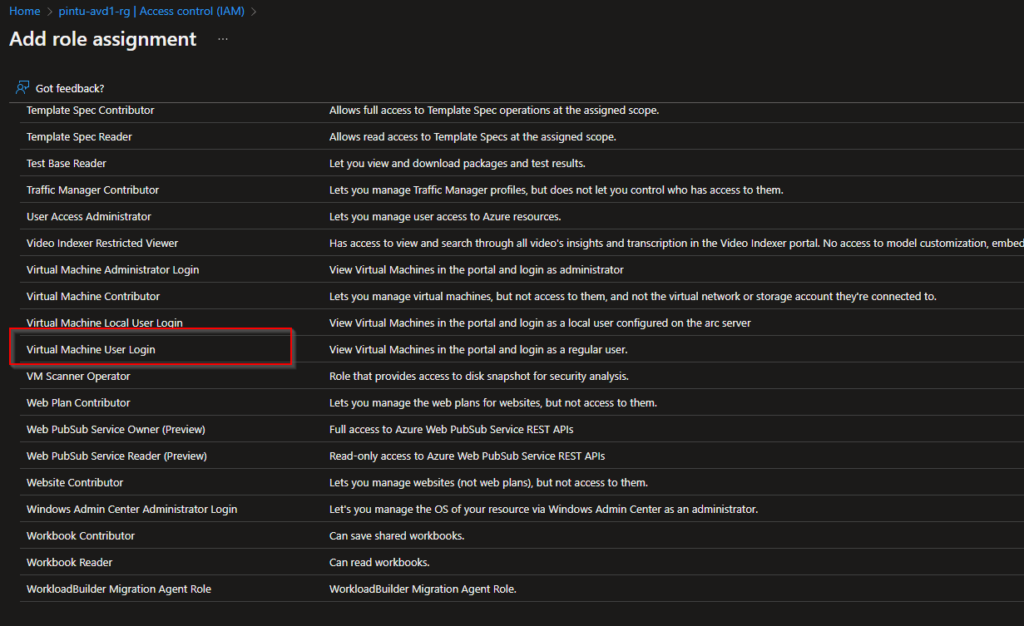
- For part 1, we will give the user permission to log in to virtual machines in our resource group. For this first, navigate to the resource group that we have been using. An easy way to do that no matter where you are in the portal is to start typing its name in the search box and then select the resource group from the results.
- Next, choose Access control
- Then choose Add role assignment
Part 2
- For part 2, we will configure what specifically we want the user to be able to log in to. AVD supports logging in to either a full desktop or a specific app, and it is possible to configure which apps a specific user can log in to. This is done through application groups. To keep things simple, we will just give the
- user access to the full desktop. To start, navigate to the host pool you created. You can again do this by typing in the search box and choosing the item you want from the results.
- Then choose Application groups:
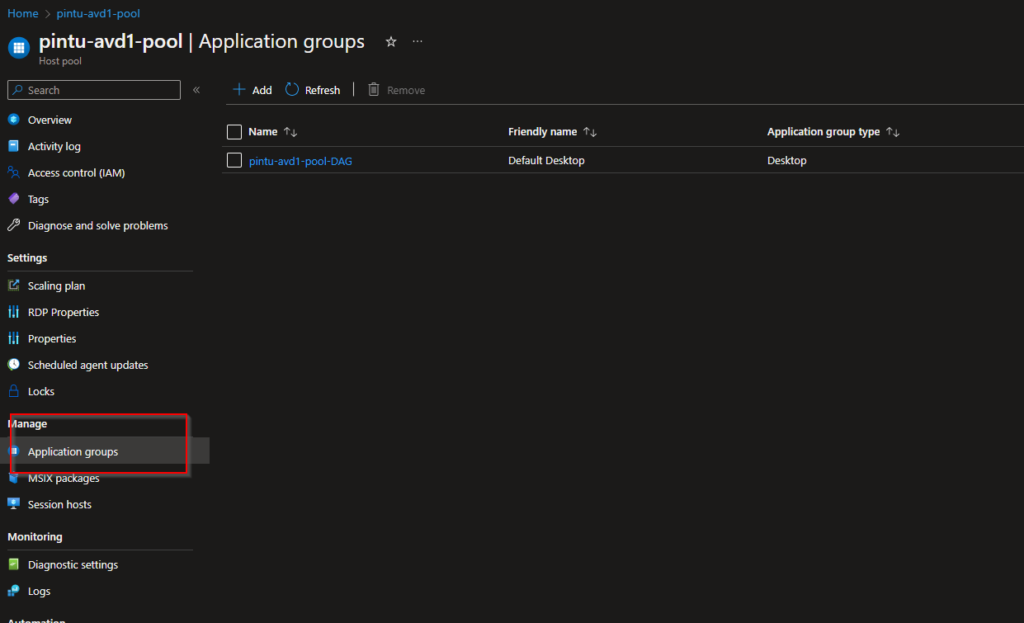
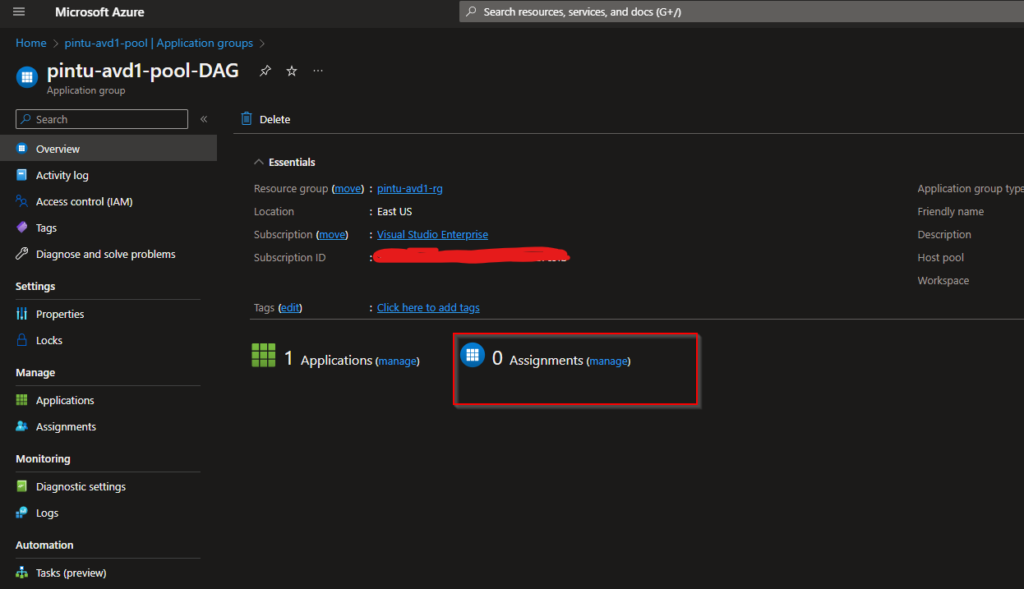
- Click on the application group ending in DAG. This stands for default application group. In AVD the full desktop is treated as a special kind of application, and is placed in this application group.
- Click on the link to manage assignments.
- Click Add, then the name of the user, then Select.
We are now done. Next step is to connecting to the desktop.
Let me know if you face any issue in setting up the Azure virtual desktop or in connecting to it.
