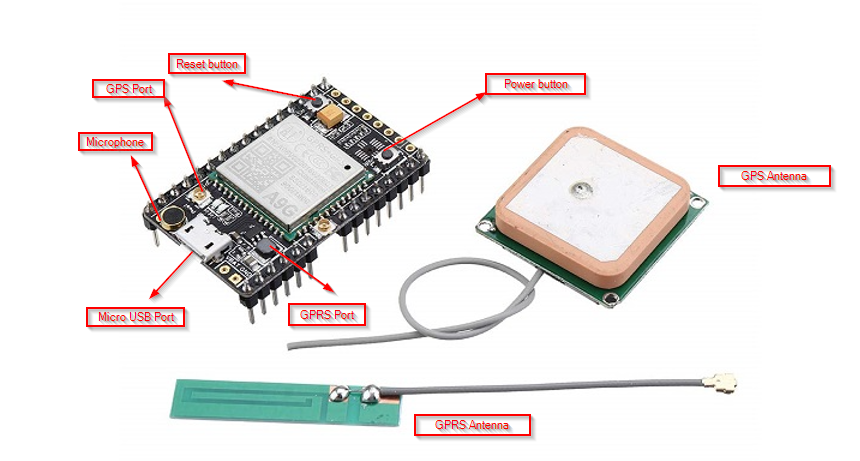
What is A9G GPS/GPRS board?
A9G GPS/GSM/GPRS pudding board is a complete quad-band GSM/GPRS+GPRS/GPS module. This module supports the basic phone voice call/SMS, serial to GPRS and GPS data transmission functions, which can be used in a wide range of applications, such as IoT, vehicle-mounted equipment, remote localization, electric power environment monitoring. It comes with 29 GPIOs and integrated SDK that could greatly facilitate private redevelopment.
Specifications
- Operating Temperature: -20℃~+70℃
- Low Power Mode Current: 2mA below (average)
- Supports for Quad-band GSM/GPRS(850/900/1800/1900MHz)
- GPRS Class 10
- Sensitivity: <-105dB
- Supports for Voice call and SMS
- GPIO Level: 2.8V
- Supports GPRS data service, the maximun download data rate is 85.5kbps, upload rate is 42.8Kbps
- Supports standard GSM07.07,07.05 AT command and Ai-Thinker expandable command set
- AT command supports standard AT&TCP/IP command port


Debugging and Testing A9G GPS/GSM/GPRS pudding board
The module uses AT firmware and hence we can use AT command to test our board. In order to do so we will need TTL to UART convertor module.
Connections:
Tx of A9G to Rx of TTL to UART
Rx of A9G to Tx of TTL to UART
GND of A9G to GND of TTL to UART
5v of A9G to 5v of TTL to UART

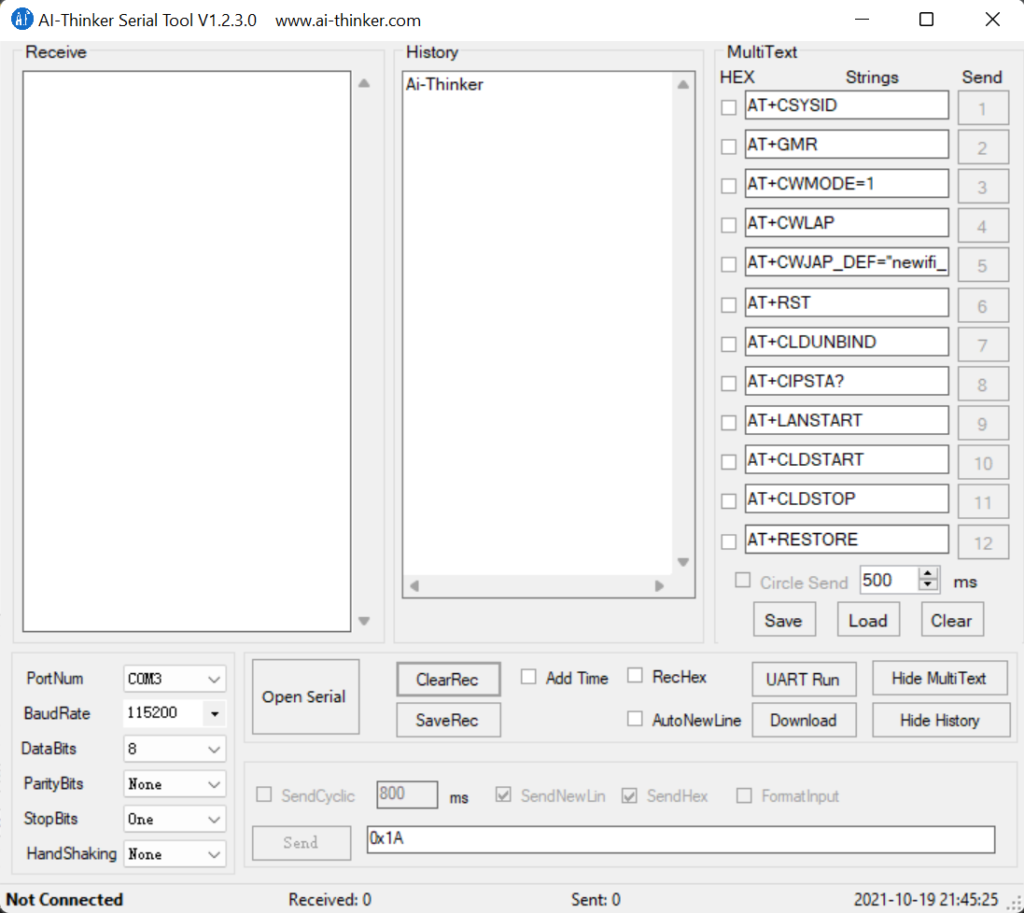
You can use any serial debugging tool to send AT command and check the board. Download the sample tool from AI thinker from here. When you launch the tool it will look something like below.
The board by default uses 115200 baud rate. Select the COM port and baud rate and open. To check the board connectivity send AT command. If you get OK it means the board is connected successfully. Note, you need a valid SIM to test your board using AT commands.

Common AT Commands
AT+RST=1 ——Software restart
GSM Commands
ATA: Used to Answer an Incoming Call. On sending this command “+CIEV: “CALL”,1 CONNECT”; the message is received.
ATD: This Command is used to dial a number this command is sent as “AT+number to be dialed” and on sending this command we receive a message saying “ATD+number dialed OK +CIEV: “CALL”,1 +CIEV: “SOUNDER”,1 “;
ATH: This command is used to disconnect a call. This command is sent as “ATH” and on sending this we receive a message “+CIEV: “CALL”,0 OK”;
AT+SNFS=0: This command used to enable any earphones/headphones connected to the module. This command enables them.
AT+SNFS=1: This command is used to enable Loudspeaker selection.
AT+CHUP: This command causes the mobile terminal to hang up the current call
SMS Commands
AT+CMGS: This command is used to send SMS to a given mobile number. The format for sending this command is "AT+CMGS=mobile number. On sending this command the monitor will show > You can now type the message text and send the message using the - key combination: TEST After some seconds the modem will respond with the message ID of the message, indicating that the message was sent correctly: "+CMGS: 62". The message will arrive on the mobile phone shortly.
AT+CMGL: This command is used to read SMS messages from preferred storage.
AT+CMGF=1: This command is used to select the SMS message format. On sending his command we receive an OK. This is to read and write SMS messages as strings instead of hexadecimal characters.
GPS Commands
AT+GPS=1: This command is used to enable GPS. When this command is sent the GPS is turned On and the LED on module for GPS starts blinking.
AT+GPS=0: This command is used to turn OFF GPS. After sending this command GPS is turned OFF and LED also stops blinking
AT+GPSRD=1: This command is used to start reading GPS data and display it on the monitor. The data returned by this command is in NMEA format which needs to be converted to get into a readable form.
AT+GPSRD=0: This command is used to stop reading the GPS data.
AT+LOCATION=1: This command is used to get location data through the LBS server. It displays the location information in the form of latitude and longitude.
AT+CREG?: This command is used to check whether we are registered to the network or not. If it shows 1,1 as a response then this means that we are registered and can move ahead.
AT+CGATT: This command is similar to the CREG command. If its response is 1 then we are connected to the network.
AT+CIPSTATUS: This command is used to check whether the IP is connected or Not. If its response is “INITIAL” then it means that we are connected. If it shows something else then there is some problem.
AT+CGDCONT=1: This command is used to connect to the Internet. In this command, we need to specify the APN and IP as well in the format given as AT+CGDCONT=1, “IP”, “www”
AT+HTTPGET: This command is used to send an HTTP get request to any server link. Its format is AT+HTTPGET=”server link”.
AT+CIPMODE: This is used for selecting TCP/IP application mode. ‘0’ os non-transparent mode and ‘1’ is the transparent mode.
In next part we will see how we can write an Arduino program to send AT command to A9G board and perform different tasks. We will use Arduino pro mini or Arduino UNO.
