
In this blog we will learn how to program Raspberry Pi PICO 2 or 2W boards using Arduino IDE.
For more details on Raspberry Pi PICO refer my post on the same here.
Installation of Arduino IDE
First step is to install the Arduino IDE on your compter. You can download and install Arduino IDE by clicking on the following link:
Adding the Raspberry Pi Pico to the Boards Manager
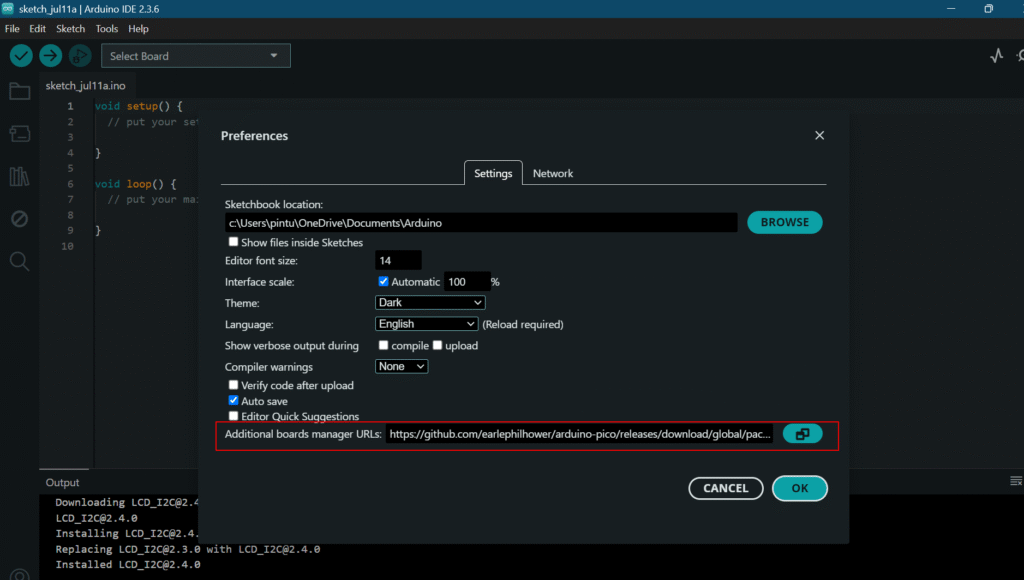
Launch Arduino IDE and go to File -> Preferences.
- Enter the following URL into the “Additional Boards Manager URLs” field:
- https://github.com/earlephilhower/arduino-pico/releases/download/global/package_rp2040_index.json
- Then, click the “OK” button.
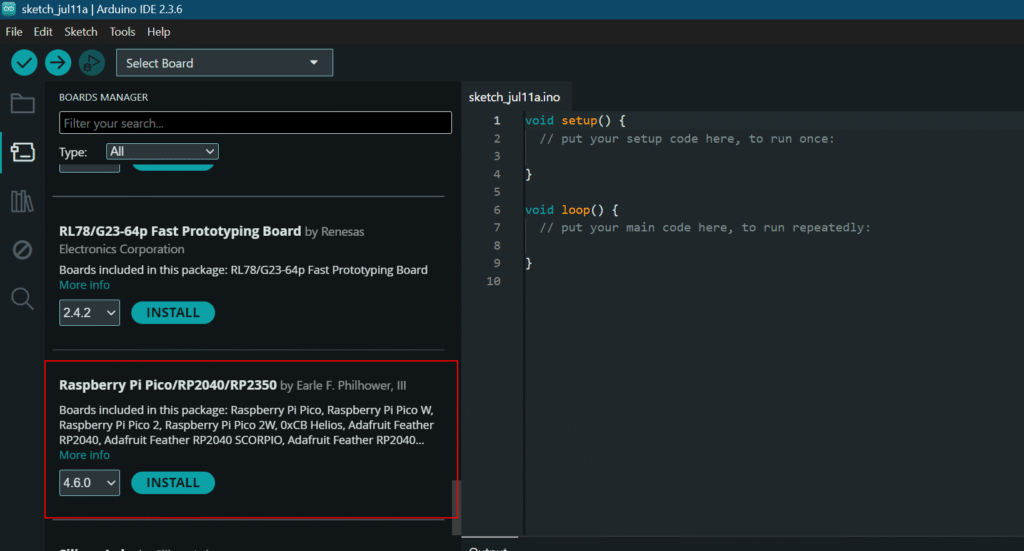
- Open the Boards Manager and Go to Tools > Board > Boards Manager…
- Search for “pico” and install the Raspberry Pi Pico/RP2040/RP2350 boards by Earle F. Phillhower. That is. It will install after few seconds.
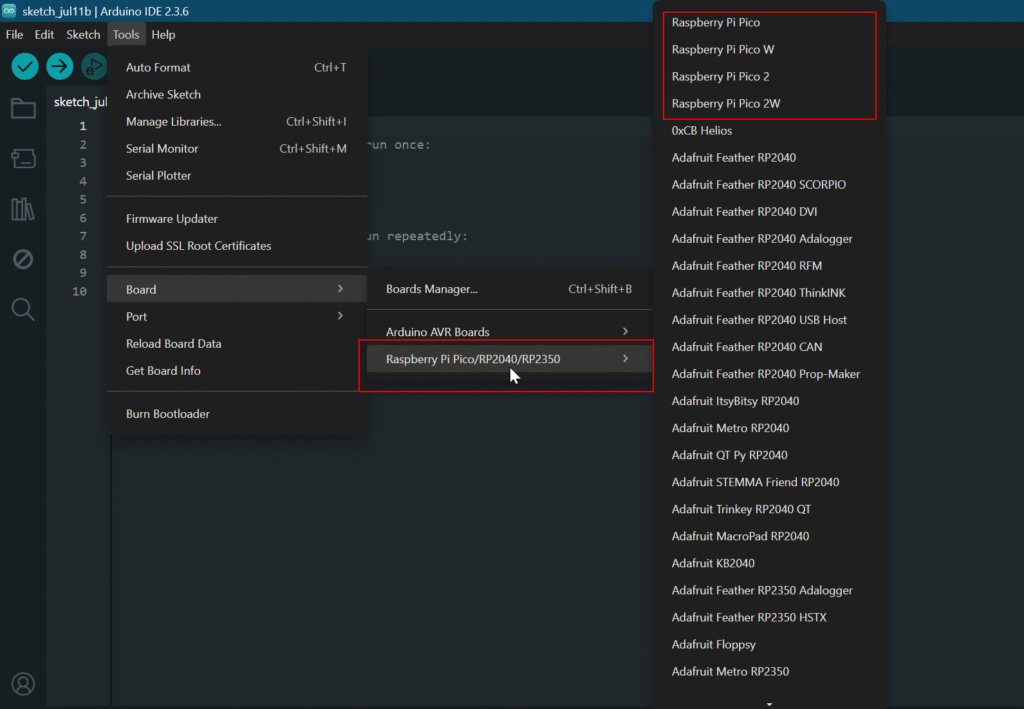
- Now if you go to tools > Board, there should be option to select Raspberry Pi PICO boards.
Selection on the PICO board
Go to Tools > Board and select the Raspberry Pi Pico model you’re using—Pico 2 or Pico 2 W (wireless support).
Loading the Blink LED Sketch
As an example, we’ll upload the classic Blink LED sketch. Go to File > Examples > 1. Basic > Blink.
The following example should load.
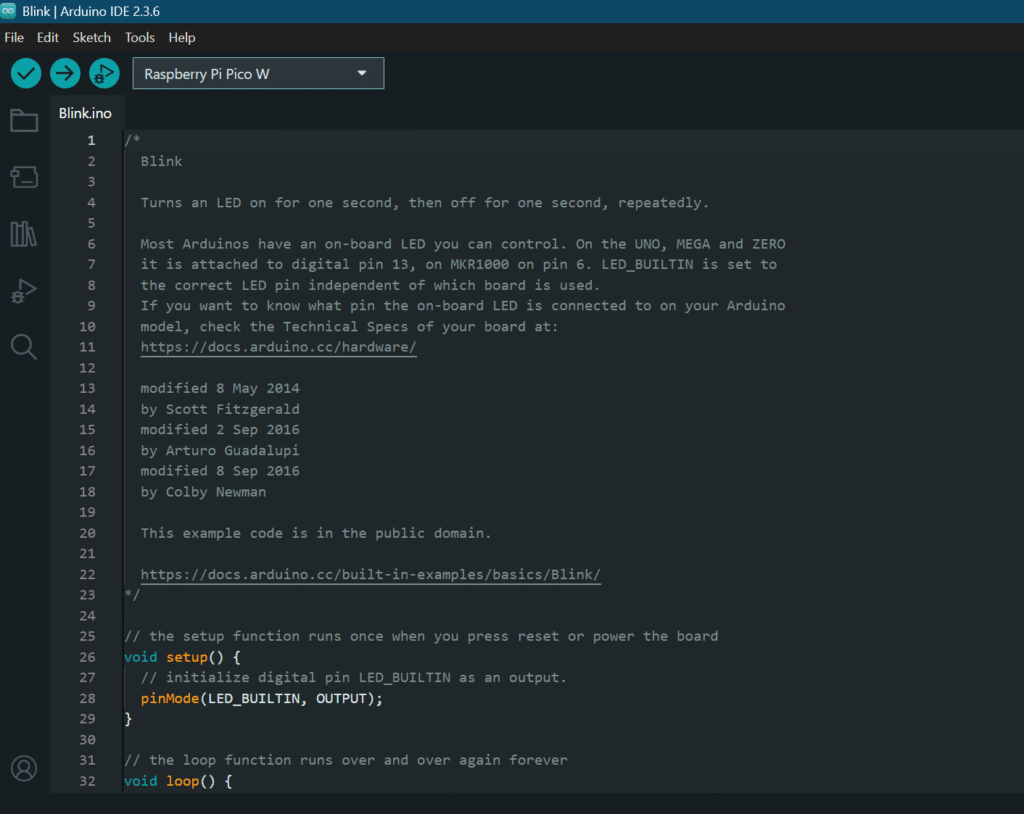
Or you can copy the following code:
/*
  Blink

  Turns an LED on for one second, then off for one second, repeatedly.

  Most Arduinos have an on-board LED you can control. On the UNO, MEGA and ZERO
  it is attached to digital pin 13, on MKR1000 on pin 6. LED_BUILTIN is set to
  the correct LED pin independent of which board is used.
  If you want to know what pin the on-board LED is connected to on your Arduino
  model, check the Technical Specs of your board at:
  https://docs.arduino.cc/hardware/

  modified 8 May 2014
  by Scott Fitzgerald
  modified 2 Sep 2016
  by Arturo Guadalupi
  modified 8 Sep 2016
  by Colby Newman

  This example code is in the public domain.

  https://docs.arduino.cc/built-in-examples/basics/Blink/
*/

// the setup function runs once when you press reset or power the board
void setup() {
  // initialize digital pin LED_BUILTIN as an output.
  pinMode(LED_BUILTIN, OUTPUT);
}

// the loop function runs over and over again forever
void loop() {
  digitalWrite(LED_BUILTIN, HIGH);  // turn the LED on (HIGH is the voltage level)
  delay(1000);                      // wait for a second
  digitalWrite(LED_BUILTIN, LOW);   // turn the LED off by making the voltage LOW
  delay(1000);                      // wait for a second
}
Connecting the Raspberry Pi Pico 2 in BOOTLOADER mode
To upload code to the Raspberry Pi Pico, it must be in bootloader mode.
If the Raspberry Pi is currently running MicroPython firmware, you need to manually put it into bootloader mode. For that, connect the Raspberry Pi Pico to your computer while holding the BOOTSEL button at the same time. A new mass storage device window will open on your computer. You can ignore it and close that window.
This is required only once. Next upload will not require to put it into bootloader mode again.
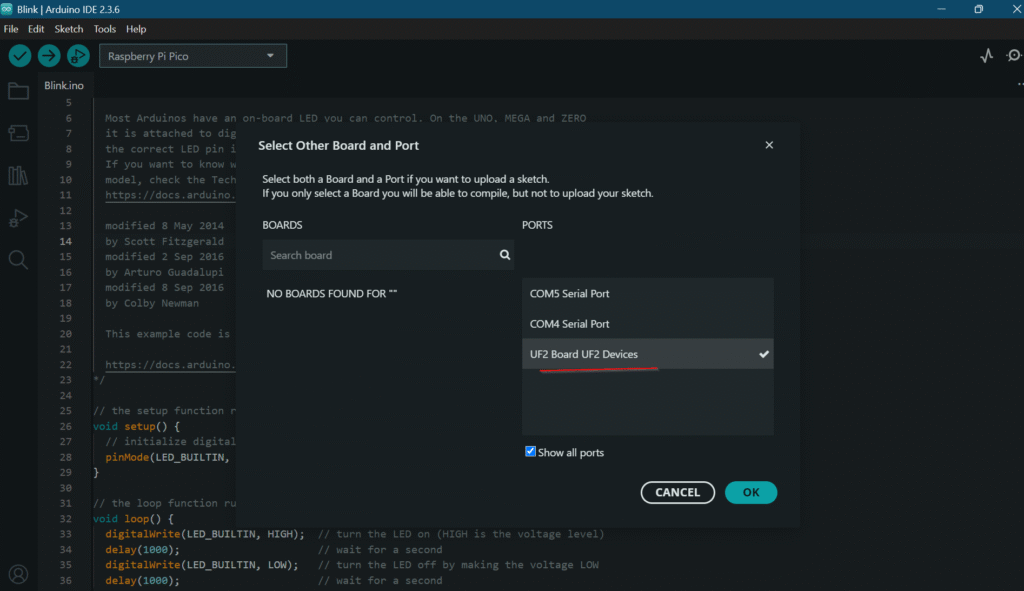
Click on Select other board and port…
Select Raspberry Pi Pico 2 or Raspberry Pi Pico 2 W and the COM Port
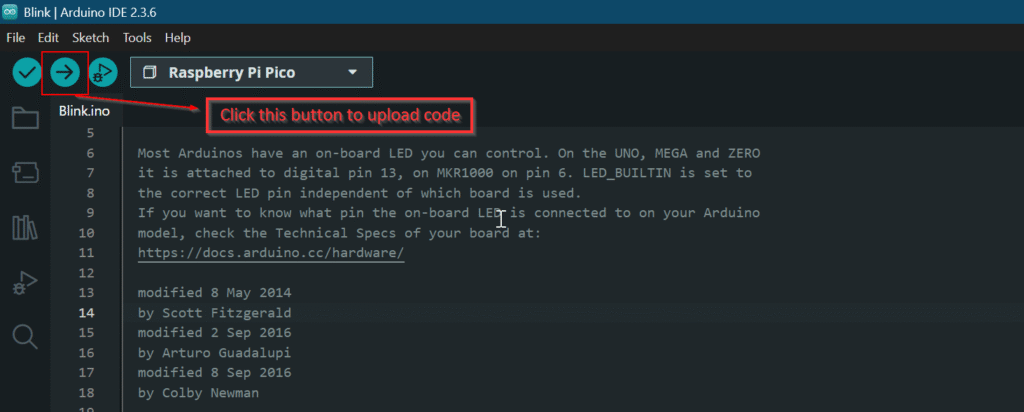
Upload the code
After this you are ready to upload your code. Click on the arrow button to upload. Once completed, success message will show as shown below in the screenshot.

If all goes as expected, the Raspberry Pi Pico onboard LED should be blinking every second.
And that’s it. You successfully programmed your Raspberry Pi Pico 2 using Arduino IDE. The below video will show Setting up Arduino IDE and running the code.