A Raspberry Pi Pico is a low-cost microcontroller device. A Raspberry Pi Pico has GPIO pins, much like a Raspberry Pi computer, which means it can be used to control and receive input from a variety of electronic devices.
Raspberry Pi Pico pairs RP2040 with 2MB of Flash memory, and a power supply chip supporting input voltages from 1.8-5.5V. It provides 26 GPIO pins, three of which can function as analogue inputs, on 0.1”-pitch through-hole pads with castellated edges. Raspberry Pi Pico is available as an individual unit, or in 600-unit reels for automated assembly.
Specification
- 21 mm × 51 mm form factor
- 21 mm × 51 mm form factor
- RP2040 microcontroller chip designed by Raspberry Pi in the UK
- Dual-core Arm Cortex-M0+ processor, flexible clock running up to 133 MHz
- 264KB on-chip SRAM
- 2MB on-board QSPI Flash
- 26 multifunction GPIO pins, including 3 analogue inputs
- 2 × UART, 2 × SPI controllers, 2 × I2C controllers, 16 × PWM channels
- 1 × USB 1.1 controller and PHY, with host and device support
- 8 × Programmable I/O (PIO) state machines for custom peripheral support
- Supported input power 1.8–5.5V DC
- Operating temperature -20°C to +85°C
- Castellated module allows soldering direct to carrier boards
- Drag-and-drop programming using mass storage over USB
- Low-power sleep and dormant modes
- Accurate on-chip clock
- Temperature sensor
- Accelerated integer and floating-point libraries on-chip
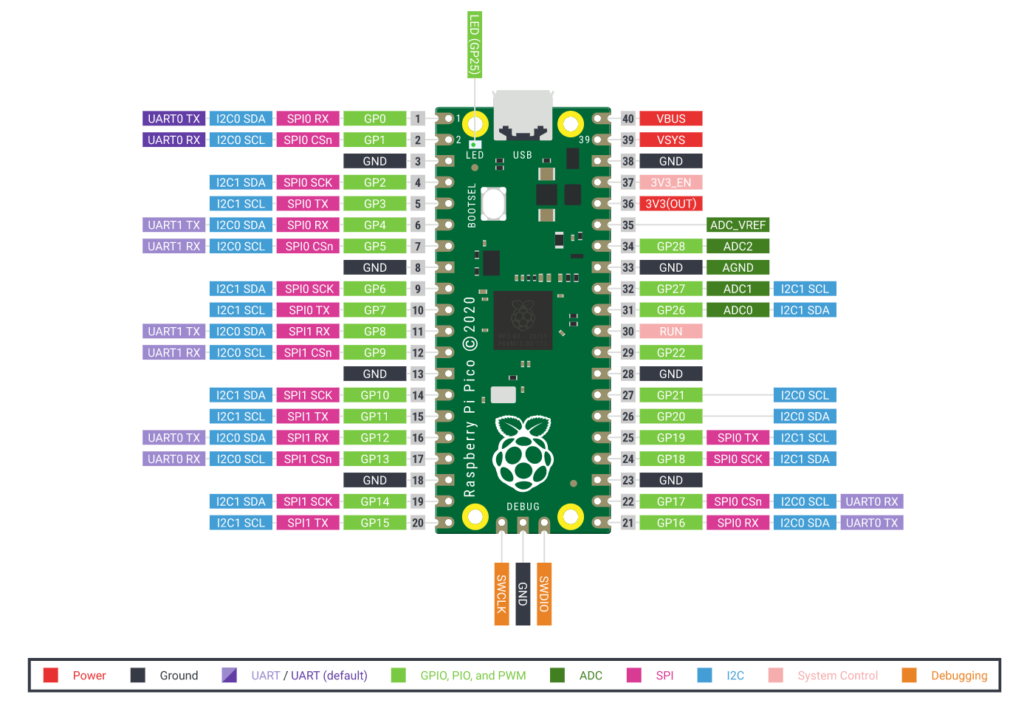
Raspberry Pi PICO pinouts
What you need
- Raspberry Pi Pico with soldered headers
- computer that can run the Thonny IDE and program a Raspberry Pi Pico
- micro USB cable
- selection of electronics components, such as a button, an LED with appropriate resistor, and a potentiometer (optional)
- breadboard and M-M jumper leads for connecting additional components (optional)
- An external 5V micro USB power source (optional)
- MicroPython firmware for Raspberry Pi Pico
- The Thonny Python IDE
If you have never used MicroPython on your Raspberry Pi Pico, you will need to add the MicroPython firmware. Follow the following steps to to do.
Step1 – Find the BOOTSEL button on your Raspberry Pi Pico.
Step2 – Press the BOOTSEL button and hold it while you connect the other end of the micro USB cable to your computer. This puts your Raspberry Pi Pico into USB mass storage device mode.
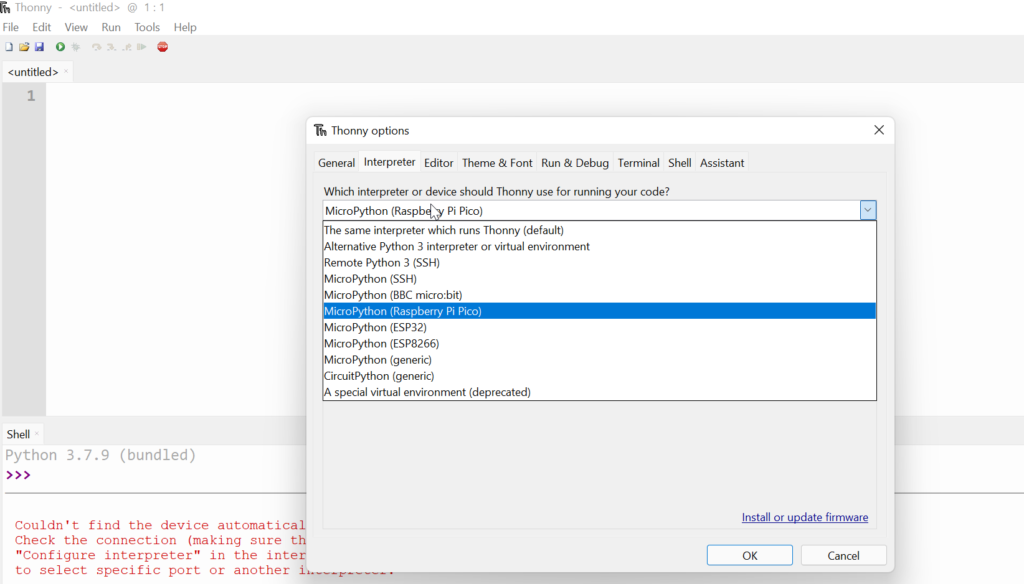
Step 3 – In Thonny Window select interpreter from Run menu. Select MicroPython as shown in the screenshot below.
Step 4 – A dialog box will pop up to install the latest version of the MicroPython firmware on your Raspberry Pi Pico. Click the Install button to copy the firmware to your Raspberry Pi Pico.
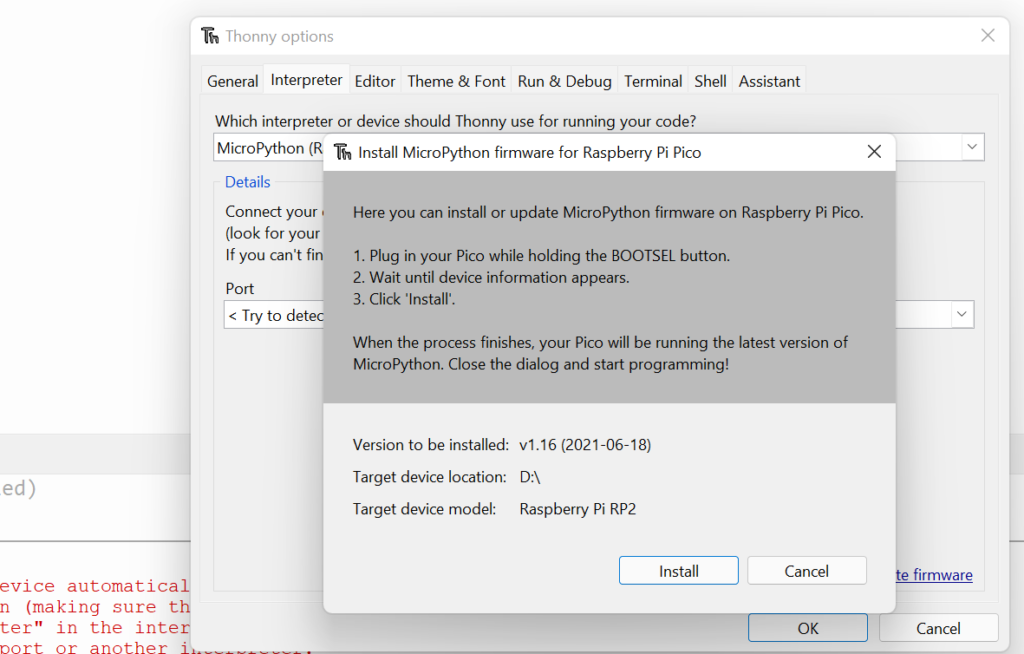
Wait for the installation to complete and click Close.
Above step will help you install MicroPython on your Raspberry Pi
Running Python code on Raspberry Pi Pico
- Connect Raspberry Pi Pico to your computer and select the MicroPython (Raspberry Pi Pico) interpreter.
2. Look at the Shell panel at the bottom of the Thonny editor. Thonny is now able to communicate with your Raspberry Pi Pico using the REPL (read–eval–print loop), which allows you to type Python code into the Shell and see the output.
3. Now you can type commands directly into the Shell and they will run on your Raspberry Pi Pico.
Type the following command.
print(“Hello”)
Tap the Enter key and you will see the output:
Print Hello output
Enter the following code, make sure you tap Enter after each line.
from machine import Pin
led = Pin(25, Pin.OUT)
led.value(1)
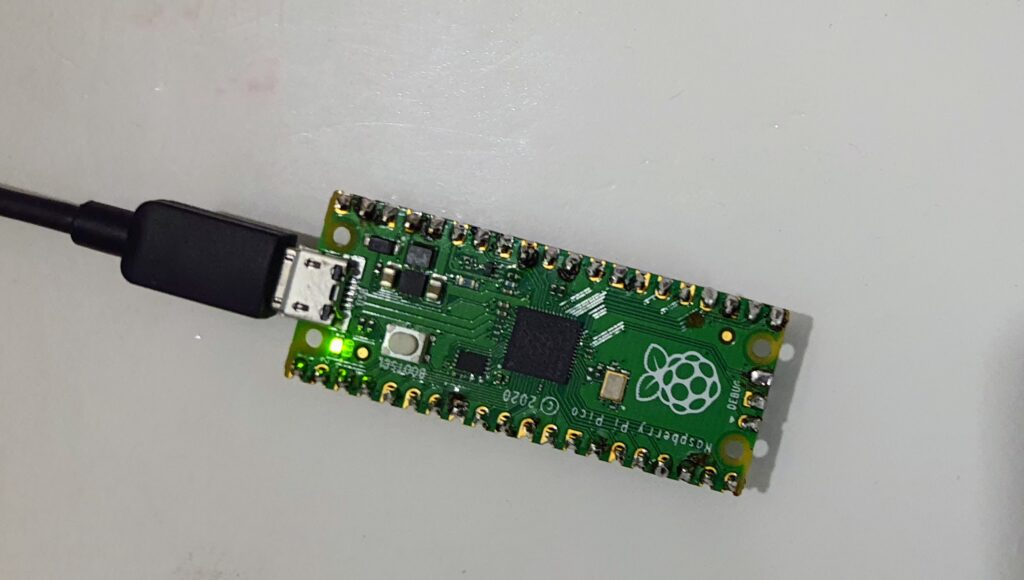
You should see the onboard LED light up.
Onboard LED on
Type the code to set the value to 0 to turn the LED off.
led.value(0)
Turn the LED on and off as many times as you like.