
This is in continuation to my earlier post on ESP32 Digital Clock using TM1637. Here we will see on how to build ESP32 Weather Clock with TM1637 Display using Weather API. We will use weather API to get local temperature and display along with local time.
Parts Required for this Project
- ESP32 dev board ( in my example I am using ESP WROOM 32 MCU Module Version: 1.1 )
- TM1637 4 Digit 7-segment display module
- Some connecting wires.
- USB cable to upload the code
Schematic diagram
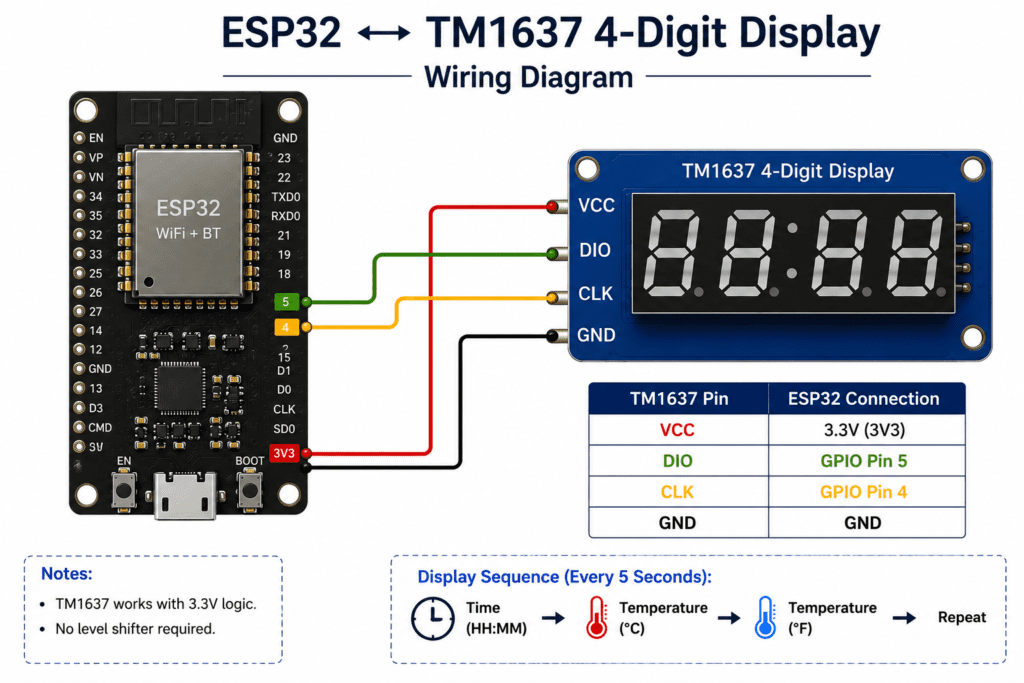
| TM1637 Display | ESP32 |
| CLK | Any digital pin (for example: GPIO 4)* |
| DIO | Any digital pin (for example: GPIO 5)* |
| VCC | VIN |
| GND | GND |
Step by Step Process
Getting Your API Key
- Go to the Weather API website: weatherapi.com/
- Signup to create an account.
- After verifying your account, login into your account.
- On your dashboard at weatherapi.com/my/ , you will find the API Key.
Installing required libraries
For this project we will be using Wifi, TM1637 module,Httpclient and Arduino Json parser library.
First 2 i.e Wifi and TM1637 library I have covered in detail in my previous blog and if you followed my blog you may already have it installed. Following 2 library will be used for HttpClient and Arduino Json parser.
- HttpClient by Adrian McEwen
- Arduinojson by Benoit Blanchon
You can use any other similar library, but in that case you may need to tweak the code to update the method name from that library.
Program
/*Pintu Shaw - Digitalab.org
Complete project details can be access from ...
Permission is herby granted, free of charge to use it for any project
 */
#include <WiFi.h>
#include "time.h"
#include <HTTPClient.h>
#include <ArduinoJson.h>
#include <TM1637Display.h>

// Wifi Details
const char* ssid = "";
const char* password = "";

// tm1637 pin
#define CLK 4
#define DIO 5

//Weather API URL and Key
const char* api_key="xxxxxxxxxxxxxxxxx";
const char* location = "Hyderabad";
String url = "https://api.weatherapi.com/v1/current.json?q=" + String(location) + "&key=" + String(api_key);


TM1637Display display(CLK,DIO);

//Timezone (Indian Standard Time /IST)
// Change as per your timezone
const char* TZ_INFO = "IST-5:30";

// Create Centigrade symbol
const uint8_t Celsius[]={
  SEG_A | SEG_B | SEG_F|SEG_G,  //circle
  SEG_A | SEG_D | SEG_E | SEG_F //C
};
//Create Fahrenheit symbol
const uint8_t Fahrenheit[]={
  SEG_A | SEG_B | SEG_F| SEG_G,  //circle
  SEG_F | SEG_E | SEG_A | SEG_G //C
};

// Global Variables for temperature and timers
float currentTempCen=9999; // Initial value as abnormal value
float currentTempFh=9999;  // Initial value as abnormal value
unsigned long lastfetchtime=0;
const unsigned long fetchInterval = 300000UL; // 5 Minute in MS


// Initialize Wifi
void initWifi(){
  WiFi.begin(ssid,password);
  while (WiFi.status() !=WL_CONNECTED) {
    delay(1000);
    Serial.println("Wait ! Connecting to wifi...");
    if (WiFi.status()==WL_CONNECT_FAILED) {
      Serial.println("Failed connection..");
      break;
    }

  }
  Serial.println("Wifi Connected - IP is ");
  Serial.println( WiFi.localIP());
}

//
bool updateTemperature(){
  HTTPClient http;
  http.begin(url);

  int httpCode = http.GET();

  if (httpCode == HTTP_CODE_OK) {  // check for http code 200
    String payload = http.getString();
    Serial.println(payload);

    // Parse the JSON
    StaticJsonDocument<1024> doc;   // Change size based on estimated response size
    DeserializationError error=deserializeJson(doc,payload);
    if(error) {
      Serial.print("Json parsig failed...");
      Serial.println(error.c_str());
      http.end();
      return false;
    }
    // Get both temperature
    currentTempCen = doc["current"]["temp_c"];
    currentTempFh = doc["current"]["temp_f"];
    http.end();
    return true;

  } else {
    Serial.print("Error in data request...");
    Serial.println(httpCode);
    http.end();
    return false;
  }
}


// Initialize Time with specified timezone
void initTime() {
  configTime(0,0,"pool.ntp.org");
  setenv("TZ",TZ_INFO,1);
  tzset();
}

//Display time on the screen
void displayTime() {
  // Blinking colon
  static bool colon = false;
  colon = !colon;
  //Get current time
  struct tm timeinfo;
  if (!getLocalTime(&timeinfo)) {
    return;
  }
  int hours = timeinfo.tm_hour; // get hours
  int min = timeinfo.tm_min; //get minutes

  int hourPart = hours*100;    //Move hours to left 2 digits
  int value= hourPart + min ; // Combine init HHMM
  Serial.print("Time is ...");
  Serial.println(value);
  //Code for blinking colon
  uint8_t colonMask;
  if (colon ==true) {
    colonMask= 0b01000000; // turn colon on
  } else {
    colonMask=0;           // turn colon off
  }
  display.showNumberDecEx(
    value,
    colonMask,     // blink colon
    true           // leading zeros
  );
}

void setup() {
    // put your setup code here, to run once:
    Serial.begin(115200);
    delay(1000);      // Time to initialize
    display.setBrightness(7);
    display.clear();
    initWifi();
    initTime();
    // Initial fetch of temperature
    if (updateTemperature()){
      lastfetchtime=millis();

    }
}
void loop() {
  // put your main code here, to run repeatedly:

    displayTime();
    delay(1000);
    displayTime();
    delay(1000);
    displayTime();
    delay(1000);
    displayTime();
    delay(1000);
    displayTime();
    delay(1000);
    // Check if its time to fetch new data
    if(millis() - lastfetchtime >= fetchInterval) {
      if(updateTemperature()) {
        lastfetchtime=millis();
      } else {
        //if failed
        Serial.println("Fetch Failed. keeping old values..");
      }
    }
    // Show Celsius temperature
    Serial.print("Temperature in Celsius : ");
    Serial.println(currentTempCen,2);
    int roundedTempCen=round(currentTempCen);
    display.showNumberDec(roundedTempCen,false,2,0);
    display.setSegments(Celsius,2,2);

    delay(5000);

    // Show Fahrenheit temperature
    Serial.print("Temperature in Fahrenheit : ");
    Serial.println(currentTempFh,2);
    int roundedTempFh=round(currentTempFh);
    display.showNumberDec(roundedTempFh,false,2,0);
    display.setSegments(Fahrenheit,2,2);
    delay(5000);


}
You can also download the code from my Github repo from below link.
https://github.com/pintushaw/ESP32Samples
Working Explanation
The heart of this project is the Wifi connection and Weather API. We first connect to local wifi using the initWifi() method. Then We initialize the time by getting it from ntp using initTime(). After this we call updateTemperature() which we get weather info from Weather API and parse to get temperature in Celsius and Fahrenheit.
The updateTemperatures() function makes a request to the WeatherAPI request URL. The request returns weather data. We print all data to the Serial Monitor.
bool updateTemperature(){
  HTTPClient http;
  http.begin(url);

  int httpCode = http.GET();

  if (httpCode == HTTP_CODE_OK) {  // check for http code 200
    String payload = http.getString();
    Serial.println(payload);
After this we parse the response and extract only the temperature and store it in global variable.
// Parse the JSON
StaticJsonDocument<1024> doc; // Change size based on estimated response size
DeserializationError error=deserializeJson(doc,payload);
if(error) {
Serial.print("Json parsig failed...");
Serial.println(error.c_str());
http.end();
return false;
}
// Get both temperature
currentTempCen = doc["current"]["temp_c"];
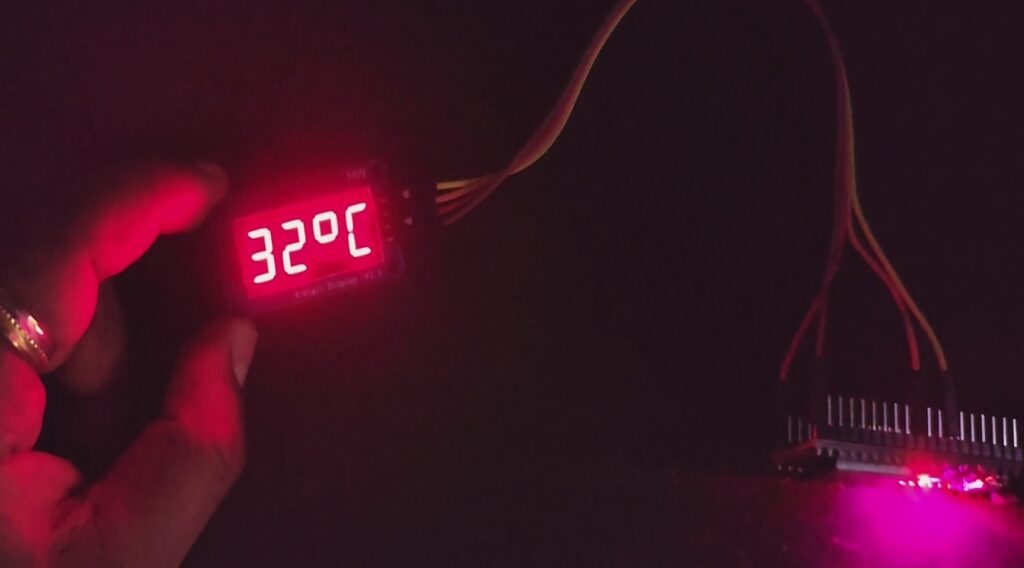
currentTempFh = doc["current"]["temp_f"];While displaying the data, we are displaying time, celsius temperature and Fahrenheit temperature every 5 sec alternatingly.
For more detail step by step process and code walkthrough, watch my Youtube video below. It will give you more detail insight in to the project.
Errors and Debugging
There are chances that you may get error while compiling, publishing or after publishing the code. Some of the troubleshooting points are listed below:
- If you have used some other library than what I mentioned, then the method name and parameter may vary. Review that in case of compilation error.
- Try to double check on wiring. It is easy to connect to different pins by mistake.
- Sometime cheap TM1637 comes faulty. Check by replacing with new ones.
- Use 3.3v instead of 5v. ESP32 sometime behave differently when 5v logic level are used.
- Check wifi ssid and password. Especially if there are connection issue.
- Copy API Key correctly. Sometime spaces are included when copying.
Let me know how it goes for you and if you have any issues/errors.