
Automate UI Testing using Instruments
An instrument is a powerful tool that can be used to automate UI testing. Instruments can also be used to collect data about the performance and behavior of one or more processes on the system and track that data over time. Although most instruments are geared toward gathering trace data, the User Interface instrument helps automate data collection. With it you can record user events while you gather your trace data. You can use this recording to reliably reproduce the same sequence of events over and over again.
Launching Instruments
Instruments is contained within the Xcode 4 toolset. Download Xcode from the App Store and install it onto your computer. After you have installed Xcode, you are ready to run Instruments. Instruments can be launched in one of three ways.
To run Instruments from Xcode
- Open Xcode.
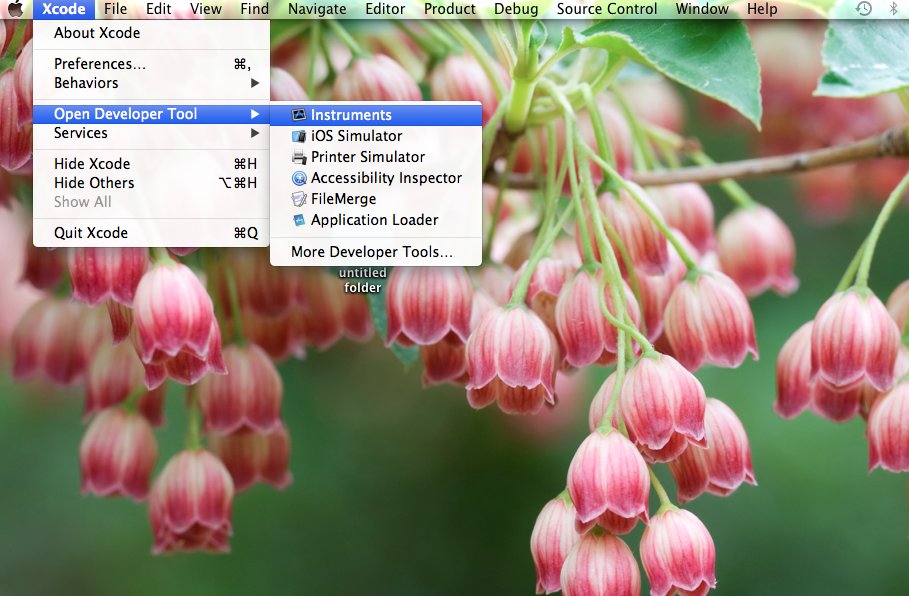
- Choose Xcode > Open Developer Tool > Instruments.
Even though each instrument is different, there is one general workflow when collecting information from your app. This workflow is a four-step process.
- Choose a trace template
- Direct Instruments to your app
- Collect information from about your app
- Examine the collected information
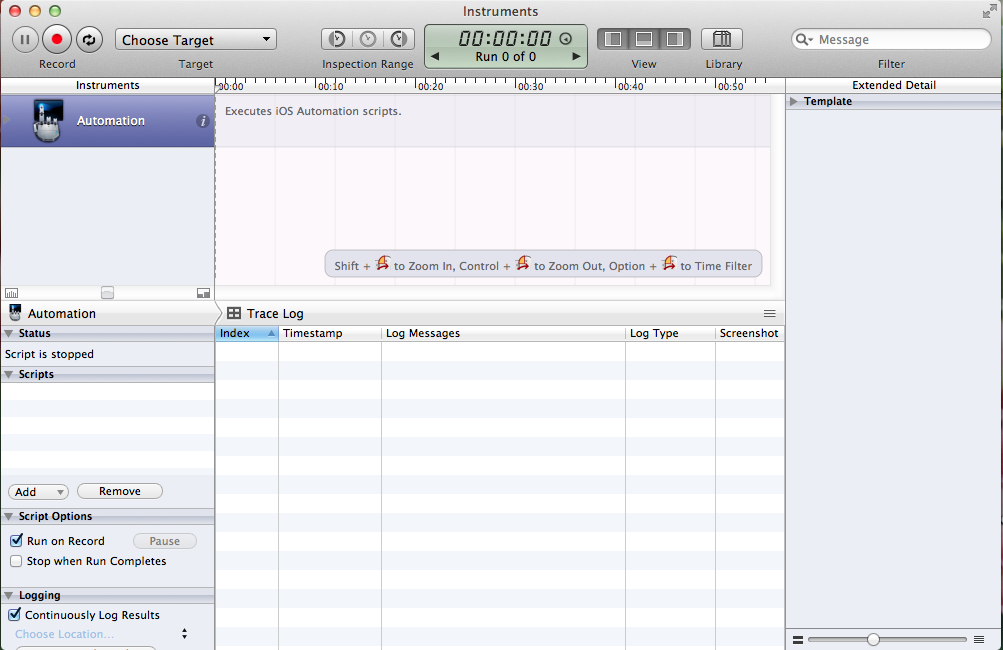
For UI automation we will be using Automation template in Instruments to execute scripts. An important benefit of the Automation instrument is that you can use it with other instruments to perform sophisticated tests such as tracking down memory leaks and isolating causes of performance problems.
Note: The Automation instrument only works with apps that have been code signed with a development provisioning profile. Apps signed with a distribution provisioning profile cannot be automated with the UI Automation programming interface.
Writing an automation test script
In instruments we use JavaScript for writing test scripts. To create a script
- Select the Automation trace template.
- Click Add > Create.
- Double-click New Script to change the name of the script.
- In the Detail pane, select Console to enter the code for your script.
- Choose a target for your script.
- Click the Play button at the bottom of the Console.

Selecting trace template
After you create the script, it can be used throughout the development of your app. You can do this by importing your saved script and running it with the Automation instrument.
To import a previously saved script
- Select the Automation trace template.
- Click Add > Import.
- Navigate to your saved script file and click Open
Accessing and Manipulating UI Elements
To perform an action on an element in your app, you explicitly identify that element in terms of the app’s element hierarchy. Each accessible element is inherited from the base element, UIAElement. Every element can contain zero or more other elements. Script can access individual elements by their position within the element hierarchy. However, you can assign a unique name to each element by setting the label attribute and making sure Accessibility is selected in Interface Builder for the control represented by that element.
The four properties used in the scripts to access elements are
- name. Derived from the accessibility label
- value. The current value of the control, for example, the text in a text field
- elements. Any child elements contained within the current element, for example, the cells in a table view
- parent. The element that contains the current element