
Introduction
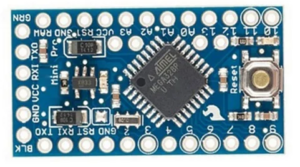
The Arduino Pro Mini is a low-cost, and small size arduino board with the minimum of components (no on-board USB or pin headers). This makes it a good choice for a board you want to leave embedded in a project. Please note that there are two versions of the board: one that operates at 5V and one that operates at 3.3V. Also, both boards come with 2 different processors ( ATMega328P and ATmega128).

How to program Arduino pro mini
Since the board does not have USB circuitry, uploading sketches is not straight forward. You need USB-to-TTL serial convertor.
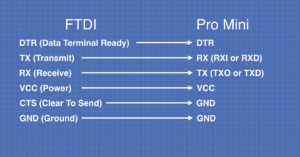
Pin connection with Arduino Pro Mini and USB to TTL convertor (FTDI)
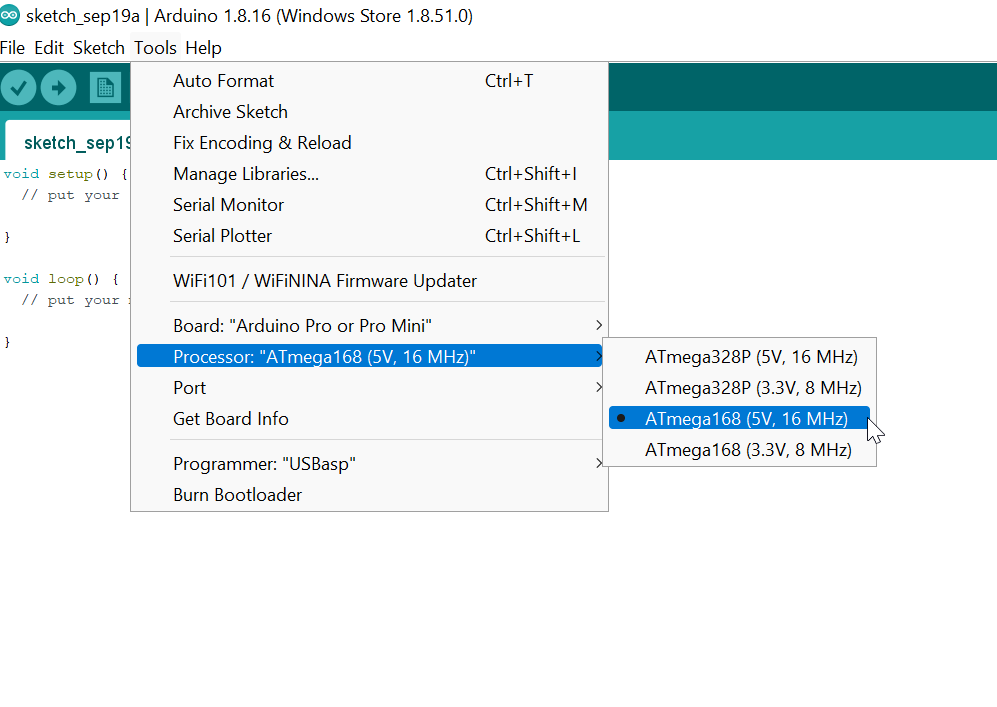
Once you connect to the USB to TTL convertor, launch Arduino IDE and select board as Arduino Pro Mini. Make sure to select correct board( 3.3v or 5v and 328P or 128 Processor). Refer the screenshot below:
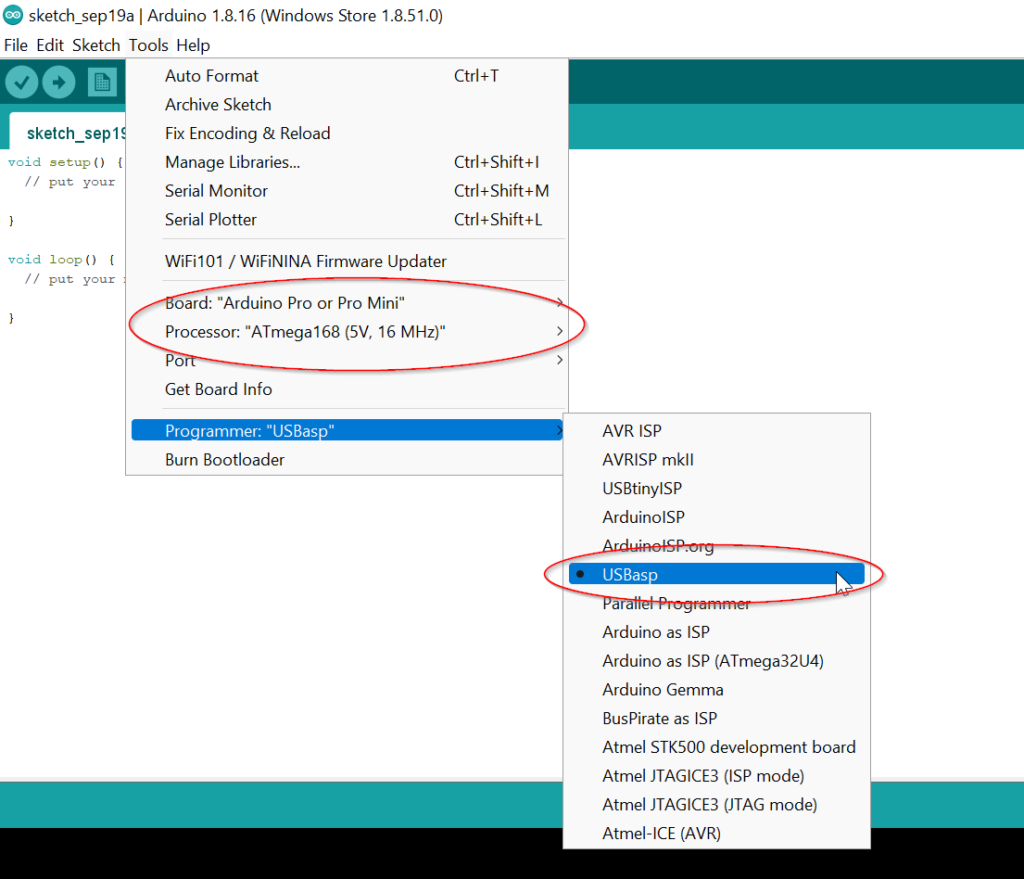
Next select Programmer as USasp. Refer screenshot below:
Troubleshooting
- If you have challenge in uploading, check if light is blinking in Arduino board. If not then then bootloader is not present. But this will be least probable if you buy from right source.
- Check correct processor and board selection. eg. 3.3v or 5v / 328P or 128
- Recheck the pin connections especially loose connections.