
Introduction
This weather station using NodeMCU uses open weather api from openweathermap.org.
Parts required for this project
- NodeMCU
- OLED I2C display
- Some wires and USB data cable
- 5v/3.3 v battery or power supply
What is NodeMCU?
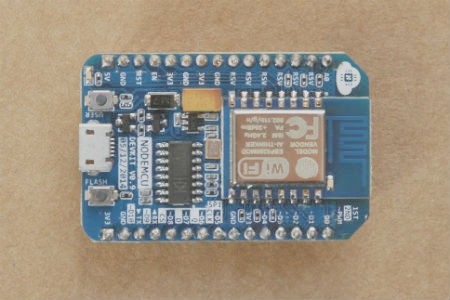
Its a Development Kit based on ESP8266, integates GPIO, PWM, IIC, 1-Wire and ADC all in one board.
What is OLED display?
The OLED display doesn’t require backlight, which results in a very nice contrast in dark environments. It consumes less power when compared with other displays. The model we’re using here has only four pins and communicates with the Arduino using I2C communication protocol. There are models that come with an extra RESET pin. There are also other OLED displays that communicate using SPI communication.
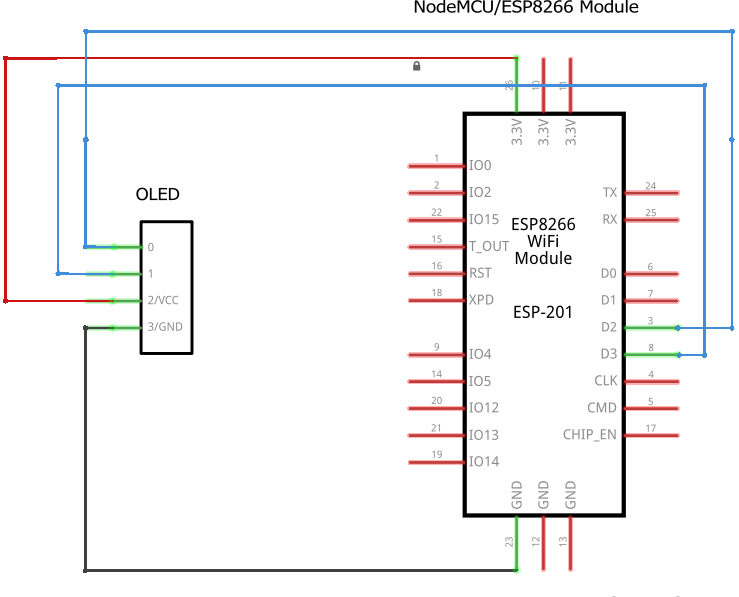
Schematic / block diagram
Pin Wiring
VCC – 3.3 v
GND – GND
SDA – D2
SCK – D3
Setting Arduino for ESP8266/NodeMCU
Steps 1 – Launch Arduino and Update preferences with
http://arduino.esp8266.com/stable/package_esp8266com_index.json
Step 2 – Installing ESP8266 board package using Board Manager
Step 3 – Install UART driver
https://www.silabs.com/products/development-tools/software/usb-to-uart-bridge-vcp-drivers
Step 4 – Install following libraries
- ESP8266 Weather Station library
- SSD 1306 OLED Library
- JSON Streaming Parser Library
Also, sign up with openweathermap.org to get API that we will be using in our code.
Code
#include <ESPWiFi.h>
#include <ESPHTTPClient.h>
#include <JsonListener.h>

// time
#include <time.h> // time() ctime()
#include <sys/time.h> // struct timeval
#include <coredecls.h> // settimeofday_cb()

#include "SSD1306Wire.h"
#include "OLEDDisplayUi.h"
#include "Wire.h"
#include "OpenWeatherMapCurrent.h"
#include "OpenWeatherMapForecast.h"
#include "WeatherStationFonts.h"
#include "WeatherStationImages.h"


/***************************
* Begin Settings
**************************/

// WIFI - UPDATE your wifi SSID and password
const char* WIFI_SSID = "HomeNet_PS";
const char* WIFI_PWD = "";

#define TZ 5.5 // (utc+) TZ in hours
#define DST_MN 0 // use 60mn for summer time in some countries

// Setup
const int UPDATE_INTERVAL_SECS = 20 * 60; // Update every 20 minutes

// Display Settings - Update pin numbers below as used.
const int I2C_DISPLAY_ADDRESS = 0x3c;
#if defined(ESP8266)
const int SDA_PIN = D2;
const int SDC_PIN = D3;
#else
const int SDA_PIN = 2; //D2;
const int SDC_PIN = 3; //D3;
#endif


// OpenWeatherMap Settings
// Sign up here to get an API key:
// https://docs.thingpulse.com/how-tos/openweathermap-key/
String OPEN_WEATHER_MAP_APP_ID = "xxxx";
/*
Go to https://openweathermap.org/find?q= and search for a location. Go through the
result set and select the entry closest to the actual location you want to display
data for. It'll be a URL like https://openweathermap.org/city/2657896. The number
at the end is what you assign to the constant below.
*/
String OPEN_WEATHER_MAP_LOCATION_ID = "1269843";

// Pick a language code from this list:
// Arabic - ar, Bulgarian - bg, Catalan - ca, Czech - cz, German - de, Greek - el,
// English - en, Persian (Farsi) - fa, Finnish - fi, French - fr, Galician - gl,
// Croatian - hr, Hungarian - hu, Italian - it, Japanese - ja, Korean - kr,
// Latvian - la, Lithuanian - lt, Macedonian - mk, Dutch - nl, Polish - pl,
// Portuguese - pt, Romanian - ro, Russian - ru, Swedish - se, Slovak - sk,
// Slovenian - sl, Spanish - es, Turkish - tr, Ukrainian - ua, Vietnamese - vi,
// Chinese Simplified - zh_cn, Chinese Traditional - zh_tw.
String OPEN_WEATHER_MAP_LANGUAGE = "en";
const uint8_t MAX_FORECASTS = 4;

const boolean IS_METRIC = true;
……
……
……
For complete code go to github at https://github.com/pintushaw/esp8266samples