
Audio amplifier using TDA1554
The TDA1554Q is an integrated class-B output amplifier in a 17-lead single-in-line (SIL) plastic power package. The circuit contains 4 x 11 W single-ended or 2 x 22 W bridge amplifiers.

A home to software testing, electronics circuits & projects, tips and tricks and digital diary.
A home to software testing, electronics circuits & projects, tips and tricks and digital diary.
Post which are classified as projects
The TDA1554Q is an integrated class-B output amplifier in a 17-lead single-in-line (SIL) plastic power package. The circuit contains 4 x 11 W single-ended or 2 x 22 W bridge amplifiers.
LM4880 is a dual power amplifier designed to produce high quality audio output capable of delivering power of 220mW per channel to 8 Ohm load using minimum external component and a 5v power supply. This can be very handy to design portable amplifier circuit.
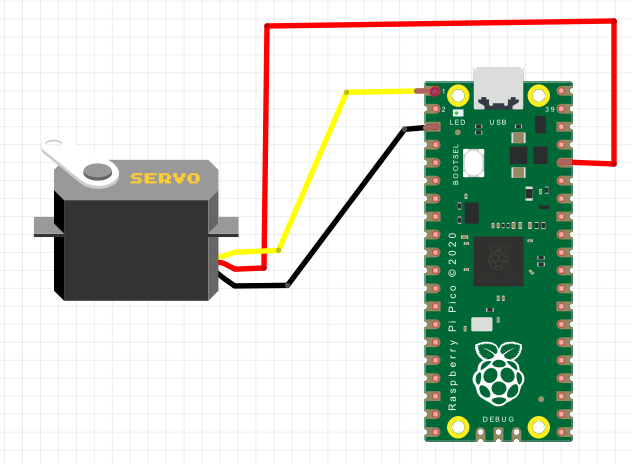
In this post we will see how to use servo motor using raspberry pi PICO
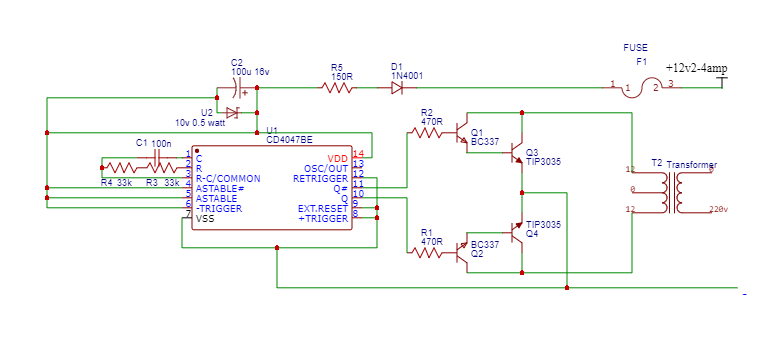
Parts Required Above is a very basic 40 watt invertor circuit.

This is a basic circuit idea of making audio amplifier using PAM8403 chip. Note that this is readily available as a module. But if you need to try your hands on it or want to modify it following circuit may…
Introduction The TEA5767 is a single-chip electronically tuned FM stereo radio module for low-voltage applications with fully integrated Intermediate Frequency (IF) selectivity and- demodulation. The radio is completely adjustment-free and only requires a very few external components. The digital tuning…

This is in continuation with my earlier post on unboxing 8 inch Waveshare LCD display Here we will see how we can connect 8 inch Waveshare LCD display to Raspberry Pi. Hardware connection Use the 15PIN FPC cable to connect…

Matrix style keypads with Arduino is very handy and easy to use for any input required. It can be used to enter passwords, control games and robots. What is needed Arduino UNO Keypad 4*4 ( you can also use 4*3 keypad…
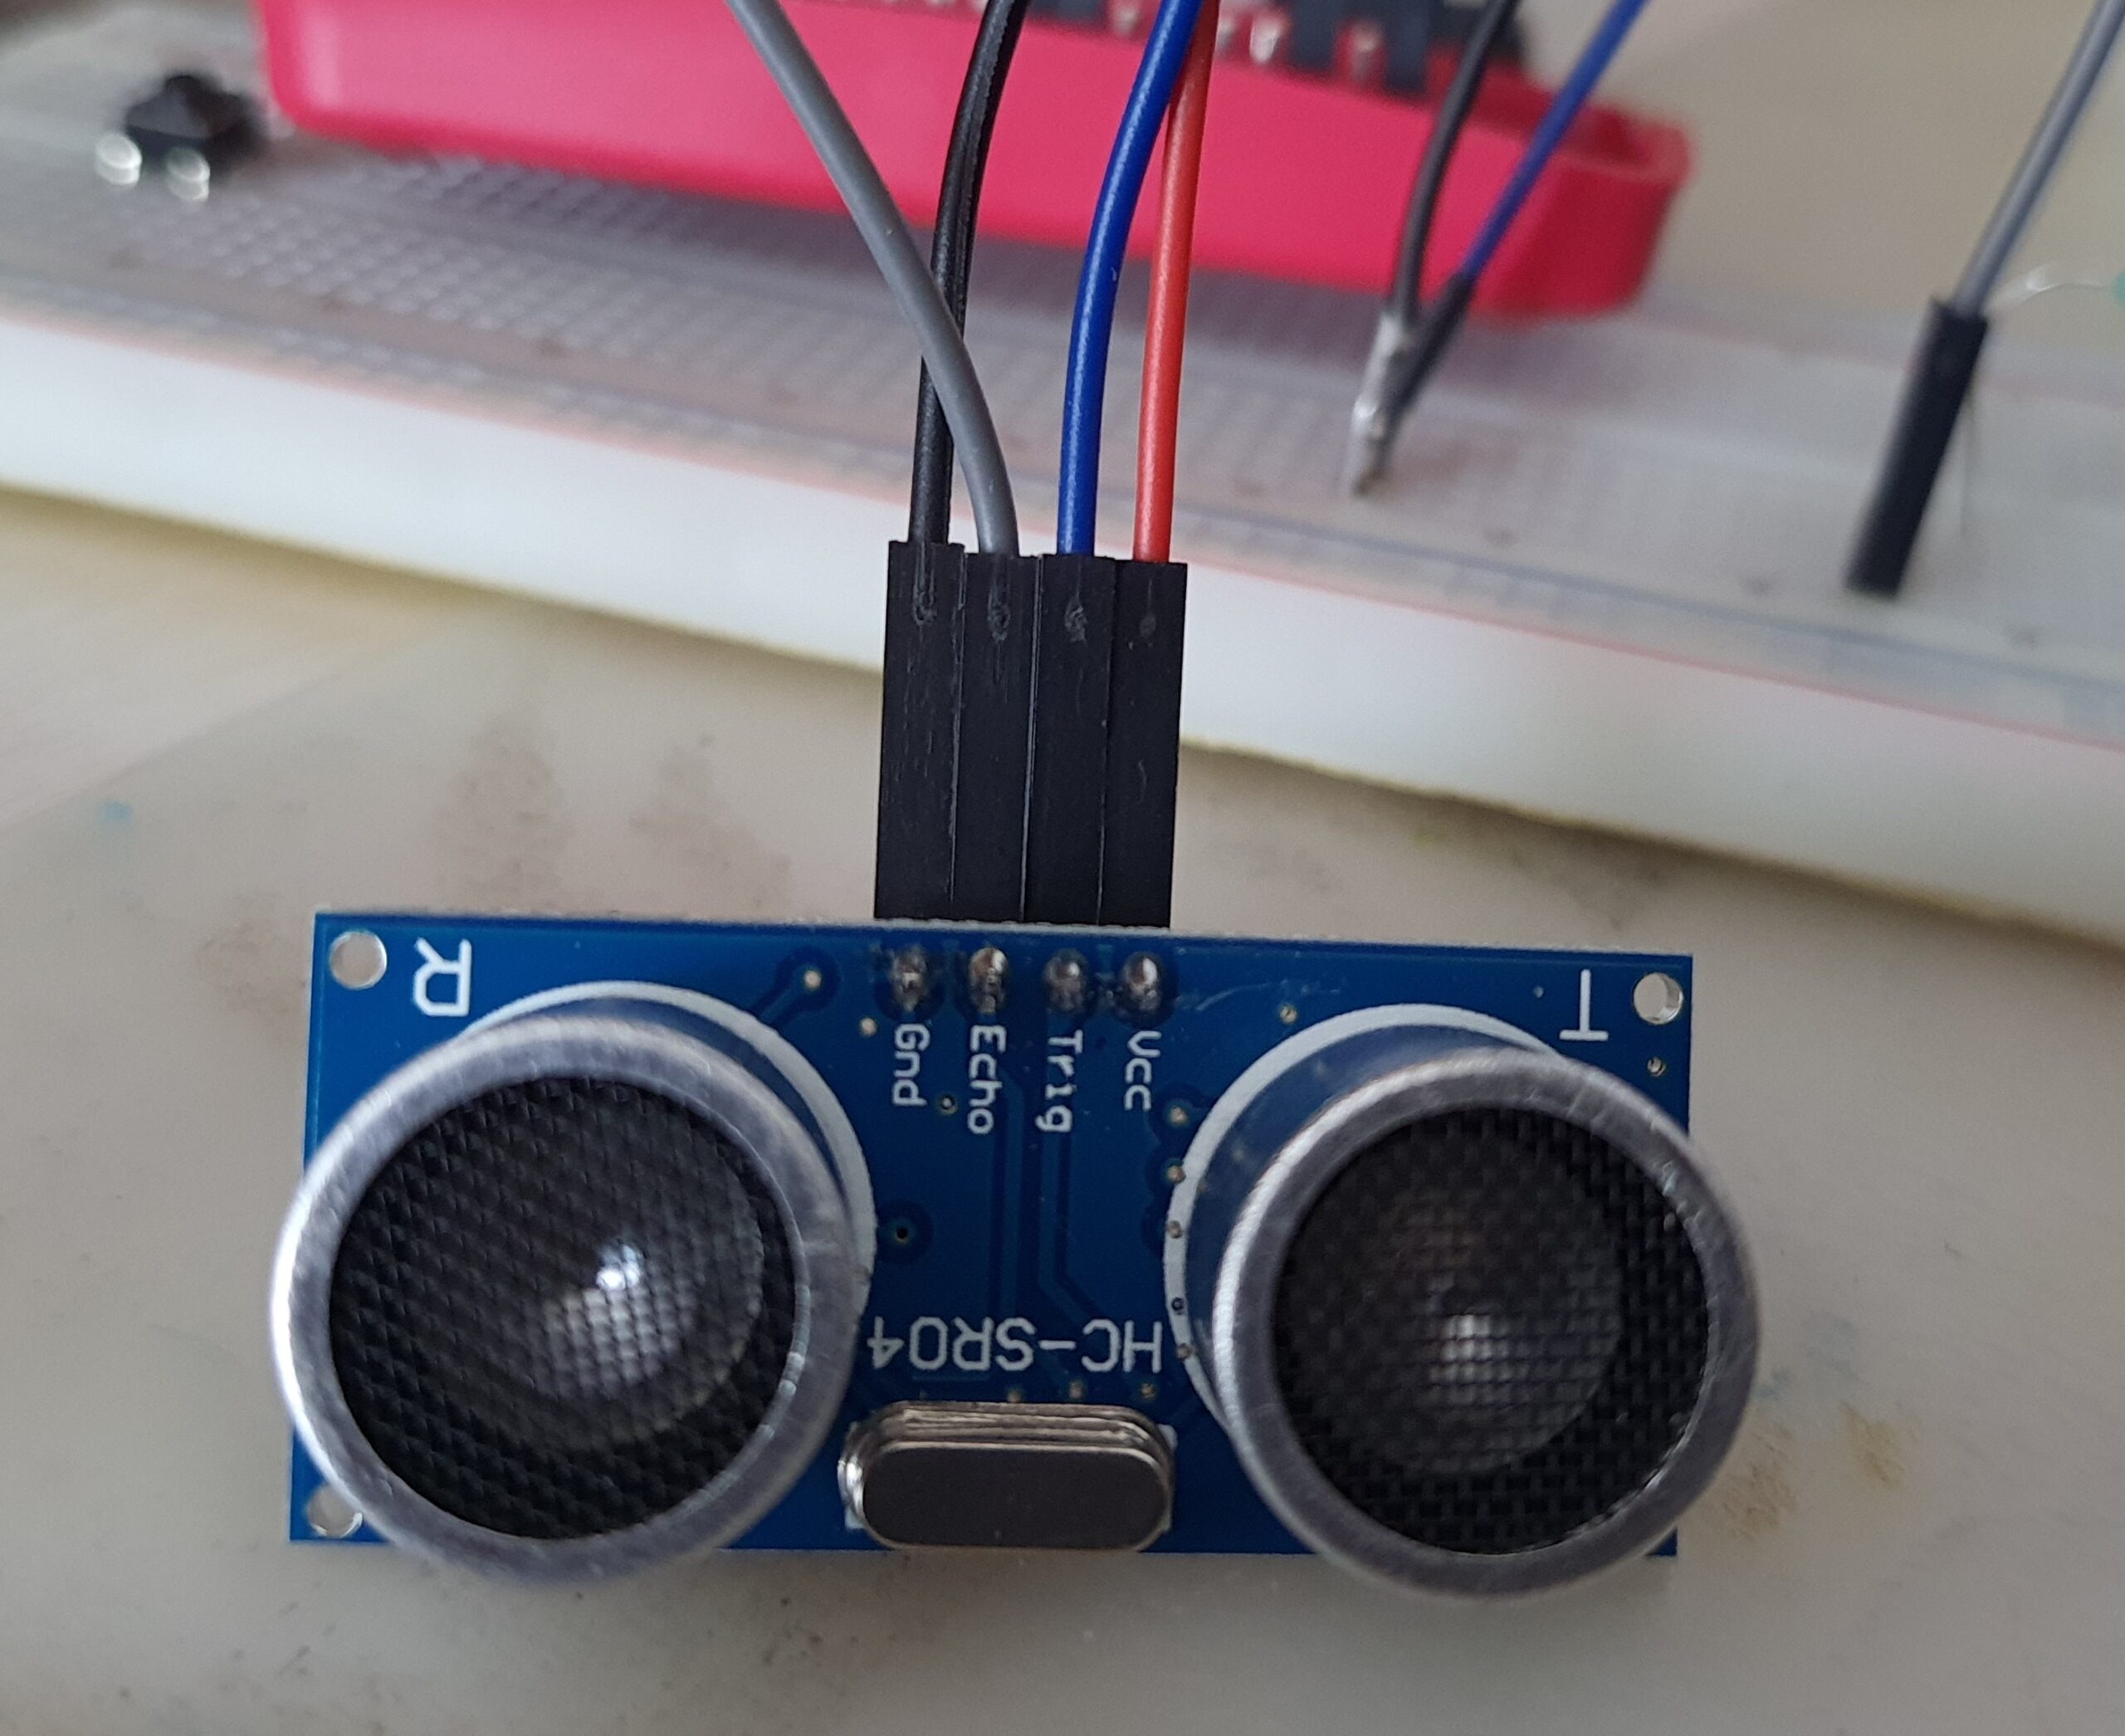
In this article I am going to calculate distance using HC-SR04 and raspberry pi. The HC-SR04 Ultrasonic sensor that I am going to use here has four pins: Ground (GND) Echo Pulse Output (ECHO) Trigger Pulse Input (TRIG) and 5V…

This display setup can be used in all Arduino projects and we only need 4 wires. 2 for data and 2 for power. This16*2 LCD using I2C with Arduino setup will simplify all your Arduino projects display requirement.